
Approvals Using SharePoint Groups
Posted on February 15, 2023 • 9 minutes • 1707 words
Table of contents
At my office, we have a lot of documents that undergo an annual review process. I was tasked pretty early on in my time here to help move this process from an Access database into the cloud. I could go on and on about the intricacies of what we set up, but I wanted to zero in on just one feature of the Power Automate flows that are set up: the group approval. Once an SOP, the documents being reviewed, has been through edits and marked up with changes, it needed to get “sent” to a variety of teams for voting – does the SOP get approved or not?
So, we needed to translate this use case into M365 tooling. I opted to use SharePoint groups and Power Automate flows with a “For a selected file” trigger. Note: one drawback of this trigger? You can’t move this into another environment. Flows with this type of trigger only function in the default environment. /funfact

Getting Set Up – SharePoint Side
Other than this big drawback, this trigger works great once you do a little user training, and our users have been able to pretty easily navigate this for over a year now. Next, we picked SharePoint groups as the mechanism for differentiating the clusters of users who would need to vote on different things. This was partly because in my organization, we have more control over this type of group, so we were able to build and name our groups as we pleased.
I won’t go into how to create a SharePoint group here (Microsoft has the steps for it), but I will tell you – note down both the name AND the ID of the group. To get the ID, go to the group and look in the URL. You want to note down the number that comes after “MembershipGroupId=”.

Starting Your Flow
Then, I built a big ol’ flow. Your flow doesn’t have to be as big as mine, but our users had 7 different groups that they wanted to account for.
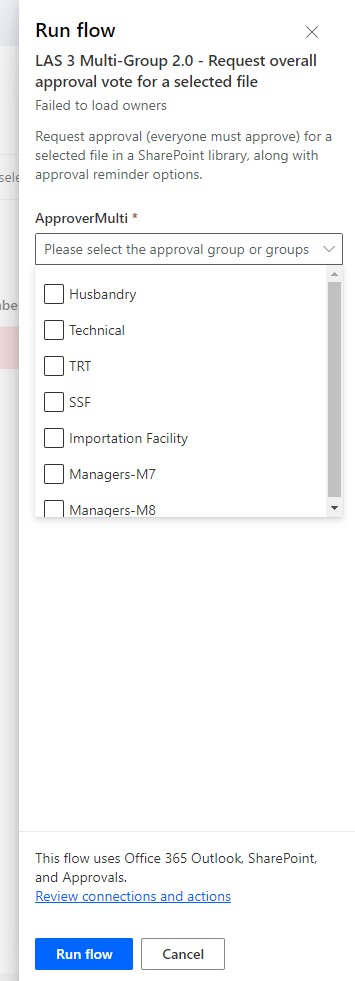
To start out, you want to use the trigger we just discussed – For a selected file (SharePoint). Here, you want to build out an input option, so click “+ Add an input” at the bottom of the trigger box. We want to give the person running the approval flow the option of which groups they want to do the voting. In my use case, I wanted them to have a multi-select list of options, meaning they can choose more than one group to vote. NOTE what you are calling this question – I called mine “ApproverMulti”. My flow trigger looks like this:
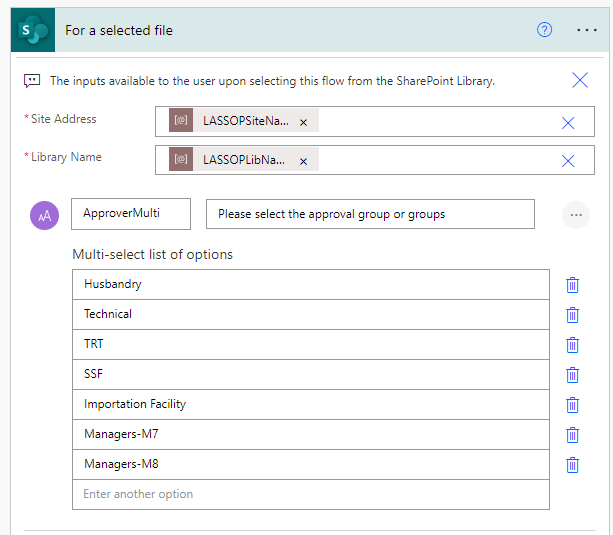
Here’s what this translates to in SharePoint:
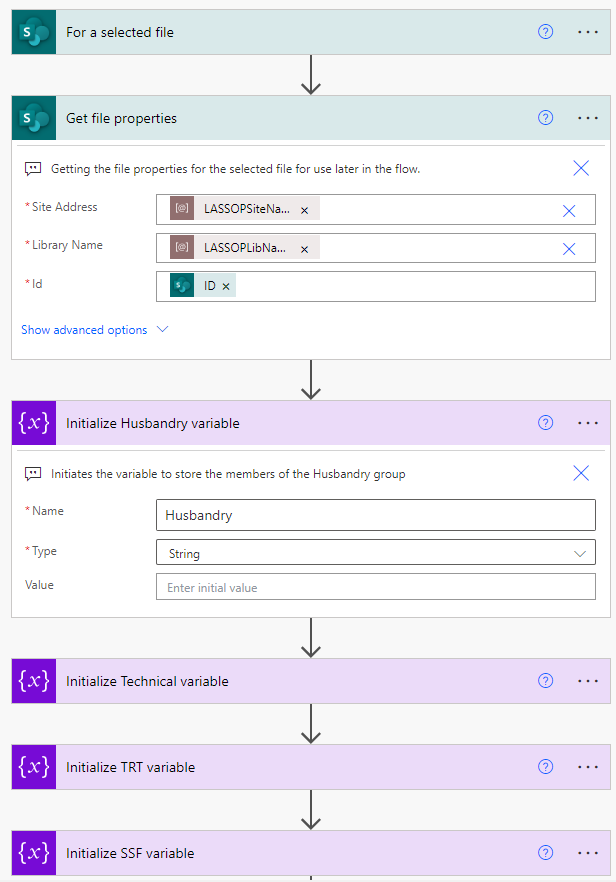
Then, your first action should be to Get file properties (SharePoint) so that you can get all of the details about the file that has been selected for voting for later use in the flow.
Build A Million Variables
Next, we need to initialize variables for each of the groups that you have voting. This will take up a bunch of blocks, but we can’t initialize (or create) a variable anywhere but at the top level of a flow, even though it would be nice to hide them in a Scope block.
Each variable can be simple – just put in the name of the group in the “Name” field and set the “Type” as “String”. NOTE: the name of the group should match what you have put in the top trigger. It does NOT need to match the actual group name in SharePoint. For example, my actual group name is something like S-LAS-Husbandry, but I just call it Husbandry. As long as I call it exactly that throughout my flow, the references will all work. Why is that? Because we are going to use that ID when we make a call to SharePoint for a list of members, not the name.
This is what your flow should look like so far (see above for what the trigger should look like), with Initialize variable actions for each of your groups.
We have one extra variable we need to create:
String variable called approversEmails, no value right now. This is going to store the email addresses of every approver from every group.
Switching It Up
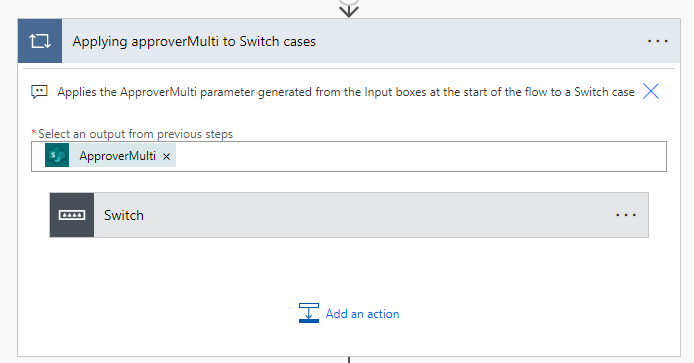
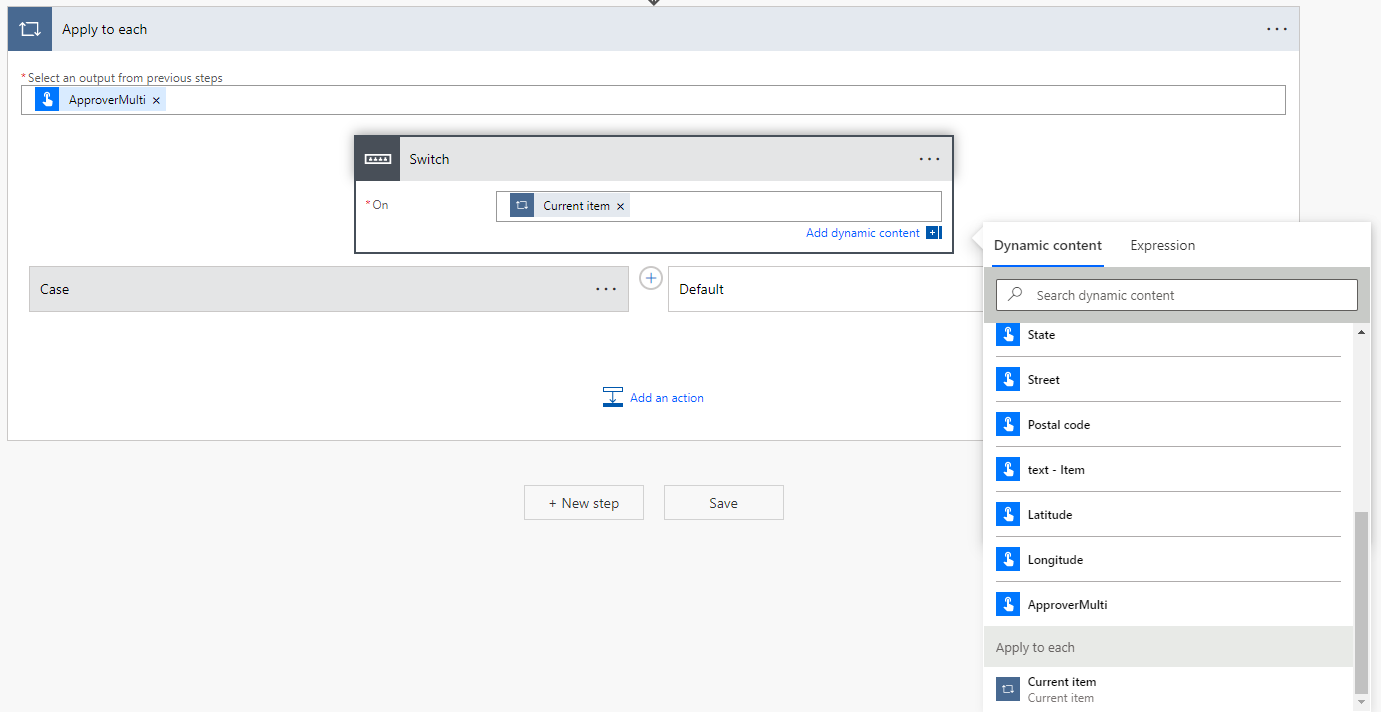
Next, we are going to put in an Apply to each block. Where it says to “Select an output from previous steps”, you are going to put in SharePoint dynamic content. Specifically, whatever you called the question in the trigger where you find out what groups the person wants to have voting. I called my “ApproverMulti” if you scroll up and check. We want to apply whatever is in the ApproverMulti field to what we are going to do next, which is to insert a Switch control inside of the Apply to each box. It should look like this:
We will want to set that switch to be on “Current item” (try looking at the bottom of your dynamic content list, that’s where it usually shows up for me), and then we need to create what is called a Case for each of the groups that someone can select.
When you create a Switch block, it defaults to giving you one Case. You can click the three horizontal dots and rename it – that’s what I do to make it clearer which group I’m working on. You can also add the Cases you need by clicking the plus sign in between the first Case and the Default, which is where you put actions for if something is selected other than what you’ve designated a Case for.
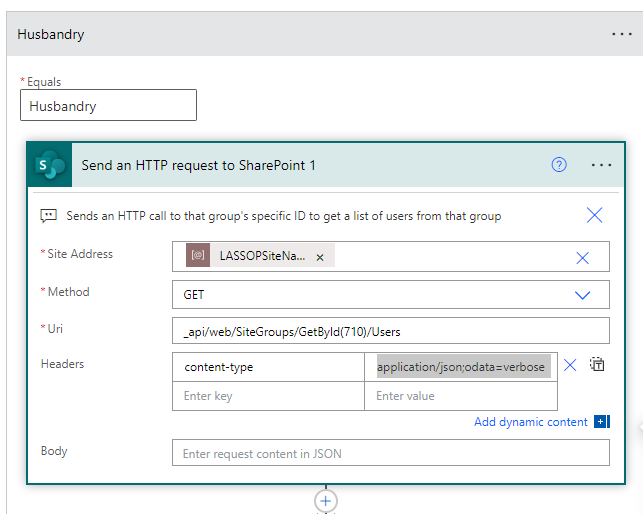
Click on each Case to expand it. Then, you need to put what that Case equals. This is telling Power Automate, “Hey, when what is in the Switch block equals “blank”, then do the series of actions I’m going to put in this Case block”. So that’s why I’m making a Case block for each of my group names, and then I don’t need to worry about the Default action – the person starting the flow can’t select anything but the options I’ve given then.
Over and Over and Over
It’s about to get repetitive. The actions I’m going to tell you to put inside one of your Cases, you will adjust and put in every single one of your Cases, but with the appropriate group ID.
Start with a Send an HTTP request to SharePoint action. This is where we are going to use the group ID to get the list of users who are in that group. Here is the Uri you are going to input, but with your own group ID (where the 710 is):
_api/web/SiteGroups/GetById(710)/Users
For Headers, put in:
(key) content-type
(value) application/json;odata=verbose
So, yours should look something like this:
The next step might look a little scary, but it’s meant to help give us more data to work with. Add a Parse JSON action. I’ll give you the Schema that I use and you can try to copy/paste it, but if that doesn’t work, here’s what to do: run the flow up to the HTTP request. Copy the output from the HTTP request in the flow run. Try the Parse JSON action again, but this time, click the button that says “Generate from sample”. You can then paste what you got and generate your own JSON. If my JSON schema works for you, try this first:
{
    "type": "object",
    "properties": {
        "d": {
            "type": "object",
            "properties": {
                "results": {
                    "type": "array",
                    "items": {
                        "type": "object",
                        "properties": {
                            "__metadata": {
                                "type": "object",
                                "properties": {
                                    "id": {
                                        "type": "string"
                                    },
                                    "uri": {
                                        "type": "string"
                                    },
                                    "type": {
                                        "type": "string"
                                    }
                                }
                            },
                            "Alerts": {
                                "type": "object",
                                "properties": {
                                    "__deferred": {
                                        "type": "object",
                                        "properties": {
                                            "uri": {
                                                "type": "string"
                                            }
                                        }
                                    }
                                }
                            },
                            "Groups": {
                                "type": "object",
                                "properties": {
                                    "__deferred": {
                                        "type": "object",
                                        "properties": {
                                            "uri": {
                                                "type": "string"
                                            }
                                        }
                                    }
                                }
                            },
                            "Id": {
                                "type": "integer"
                            },
                            "IsHiddenInUI": {
                                "type": "boolean"
                            },
                            "LoginName": {
                                "type": "string"
                            },
                            "Title": {
                                "type": "string"
                            },
                            "PrincipalType": {
                                "type": "integer"
                            },
                            "Email": {
                                "type": "string"
                            },
                            "Expiration": {
                                "type": "string"
                            },
                            "IsEmailAuthenticationGuestUser": {
                                "type": "boolean"
                            },
                            "IsShareByEmailGuestUser": {
                                "type": "boolean"
                            },
                            "IsSiteAdmin": {
                                "type": "boolean"
                            },
                            "UserId": {
                                "type": "object",
                                "properties": {
                                    "__metadata": {
                                        "type": "object",
                                        "properties": {
                                            "type": {
                                                "type": "string"
                                            }
                                        }
                                    },
                                    "NameId": {
                                        "type": "string"
                                    },
                                    "NameIdIssuer": {
                                        "type": "string"
                                    }
                                }
                            },
                            "UserPrincipalName": {
                                "type": "string"
                            }
                        },
                        "required": [
                            "__metadata",
                            "Alerts",
                            "Groups",
                            "Id",
                            "IsHiddenInUI",
                            "LoginName",
                            "Title",
                            "PrincipalType",
                            "Email",
                            "Expiration",
                            "IsEmailAuthenticationGuestUser",
                            "IsShareByEmailGuestUser",
                            "IsSiteAdmin",
                            "UserId",
                            "UserPrincipalName"
                        ]
                    }
                }
            }
        }
    }
}
(Yes, I know, there are more direct ways of doing this than Parse JSON, but I like Parse JSON. Feel free to do this how you please!)
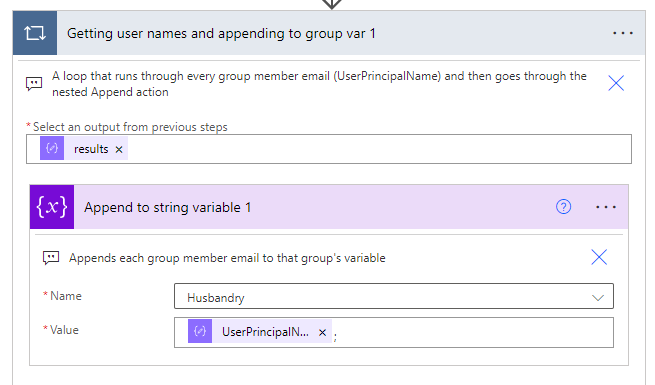
Next, add an Append to string variable block. This is where our Parse JSON new dynamic content will come in handy. We want to get the UserPrincipalName from the JSON output and append it to the variable for this Case’s group. So in my example, I’m appending the Parse JSON’s UserPrincipalName dynamic content to the Husbandry group variable. Note that because there’s more than one UserPrincipalName coming out of this, it’s going to automatically pop my Append to string variable action into an Apply to each action, like so:
Lastly, we want to use one more Append to string variable action. We want to append the value of what’s now in the group variable (Husbandry, in my case) to the more generic approverGroups variable we made. This way, we can send one variable to the Start and Wait for an Approval action as the approver, even though it’s actually going to contain a potentially long list of approver emails.
Wrapping It Up
From there, it’s pretty simple! At least it can be for you – mine goes on and on and on, but that’s a me problem.
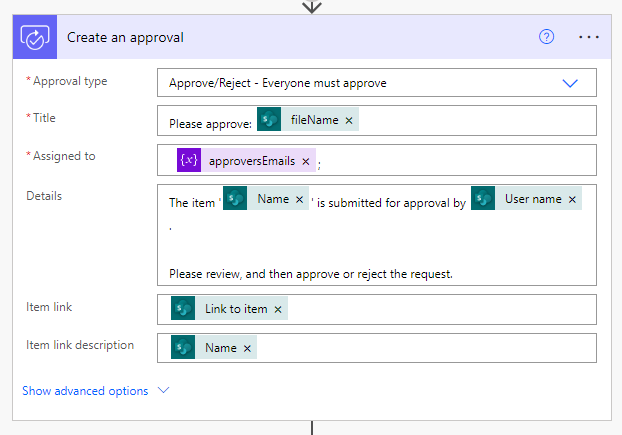
Just make sure that whichever Approval action you choose, assign it to your “approversEmails” variable.
I go further and write my approver groups back to the SharePoint doc library – comment on this post or on Twitter/LinkedIn if you’d like a part 2 to this to find out how I do that!