
Calling Multiple APIs in One Power BI Report (And All the Work-Arounds That Required)
Posted on February 2, 2023 • 9 minutes • 1851 words
Table of contents
So, this one was a lot more difficult than it should have been. It started with a plea for help on Twitter and a really helpful first blog post (created for me, so honored!) from Andy O’Donnell here. (He’s super nice, follow him on Twitter too!) Andy got me going, which I am SO grateful for… but then I ran into an error. And then another error. And another. You get the idea.
This blog post is for anyone who encounters this in their desperate web searches, hopefully to keep them company and guide them in their wanderings towards a solution. It took me a few days of wandering to find my solution, so maybe you will find your own a little faster than that now.
The Use Case
This actually came from another team in my department. The original question? “Hey, I think I might need a Power Automate flow”. Of course, I was ecstatic immediately and dove into helping my coworker however I could. Our end result did not, in fact, involve Power Automate, so I feel a little deceived, but I was ensnared in the problem solving process regardless and knew I had no choice but to carry on until I found a solution, for my own sanity.
I’m no expert on this product, but my coworker works with ServiceNow, and he wanted to hit their APIs for a Power BI report he was working on building. However, they had a limit of 4 API hits at once, and he had at least 5 calls he was wanting to make. Neither of us were aware of any way to stagger calls made directly from Power BI’s Web data connection, so off I went to the races to see what I could find.
The Simple Version of the Answer
The simple version was, as Andy so kindly wrote up for me, to create dataflows for each API. Within Power BI Web (what do we call that? I struggle to find a good name, and just calling it Power BI seems to be too vague), you can set up a refresh schedule for each API so they aren’t on top of each other. Then, in your workbook, you can pull in each dataflow as your data source and ta-da! Done! Easy!
That’s what I thought.
So, while Andy did lay out the whole process very nicely, this post isn’t for the people who can go through the process he did without errors. This post is for the rest of us. Those with many, many errors.
The Longer Version – The Dataflows
So, the first series of errors came from the dataflows. I couldn’t get my authentication to work at all. I wish I had saved all of the errors that I got so that people searching for the same could come here, but here’s a few that I did find in my History:
- “Invalid credentials for web source”
- “Power BI says my data credentials aren’t correct when they are”
- “Connection could not be created”
You get the idea. I don’t want to admit to how many times I retried that username and password, thinking “I’m the problem, it’s me” (I get it, Taylor Swift).
If you are here for answers as to why my original method of doing it was giving me this error, I’m sorry to say you will be disappointed. If you are here to find out how I got around it, then welcome – keep reading.
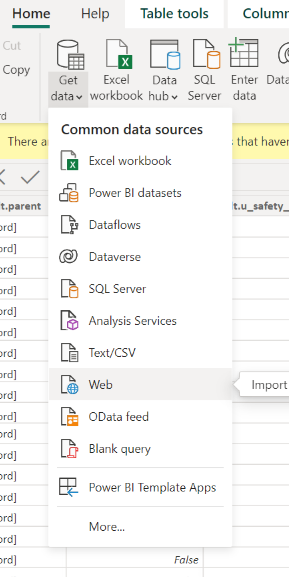
- Get data from the API in Power BI Desktop from Web API …wait, isn’t the whole thing that we are doing this differently? Stay with me, there’s a method to the madness.
So, this is really quite a few steps, but I’ll try to shorten it. Go get data from the web and put in your web API URL.
 2. For the authentication after you click Ok, use whatever your API calls for here. Mine called for Basic auth, so I put in my service account username and password.
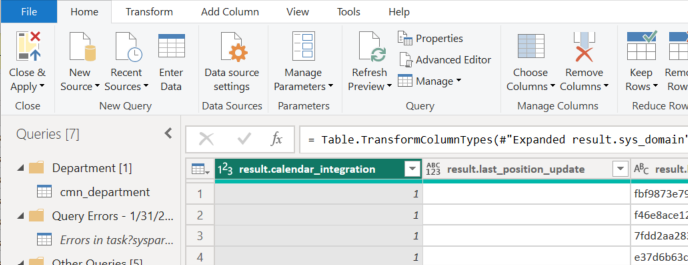
3. That should open up your data in a Power Query editor window. That’s great – we don’t actually care about this data here. Click the “Advanced Editor” button.
2. For the authentication after you click Ok, use whatever your API calls for here. Mine called for Basic auth, so I put in my service account username and password.
3. That should open up your data in a Power Query editor window. That’s great – we don’t actually care about this data here. Click the “Advanced Editor” button.
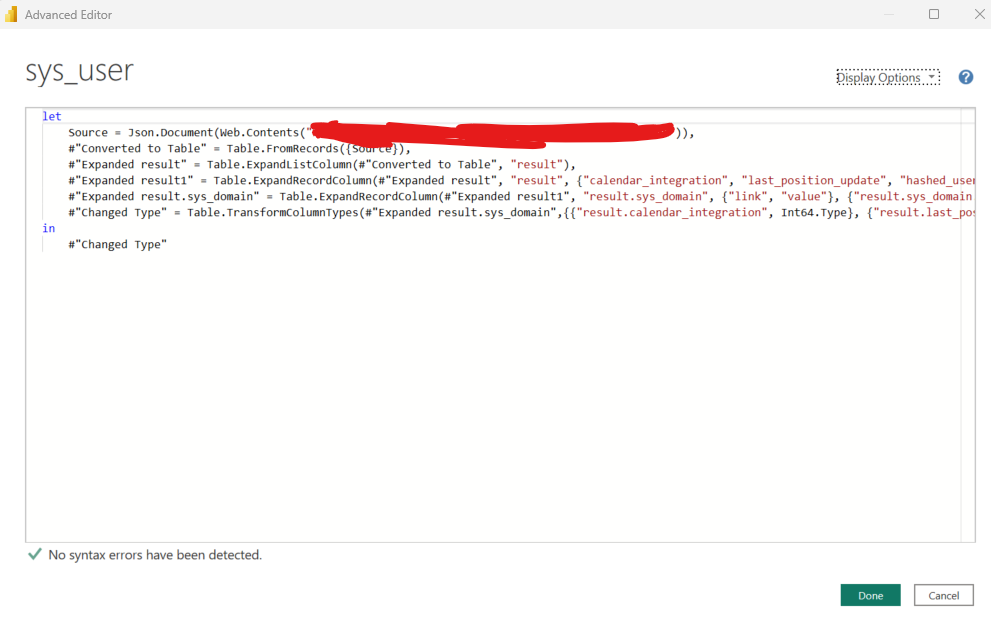
 THIS holds the good stuff that we actually need for our first workaround – the M code!
- Copy all of the code you see here – it should look something like mine, starting with “let” and ending with “in… (something)”. I’ve just crossed out the API URL in mine, but other than that, I didn’t write anything here – Power BI calculated it all for me when I imported the web API.
- Go to Power BI on the web. There’s licensing considerations here, but I’m not going to go into that because I frankly don’t understand it.
- Go to a workspace that you can use. For reference, the one I’m using was marked with a diamond icon that says it has “Premium capacity”.
- Click New and then Dataflow.
- You may get a pop-up that asks if you want to build a datamart instead. I said no and carried on.
- You now have a window to start creating your dataflow. Click the button that says “Add new tables” (if you need screenshots for these parts, see Andy’s blog)
- Click “Other” for your category, and you are going to select that you want to build a “Blank Query” for your data source.
- The blank query template should look familiar – code starting with “let” and ending with “in… (something)”. You are going to paste in your code from Power BI Desktop. Do NOT hit enter yet!
This is where I encountered the need for workaround 2, aka more credential problems.
Mo’ Progress, Mo’ Credential Problems
We are going to build our own Authorization Header into our M code for steps 12-14. Low code just got low-to-mid code, people. Don’t worry, there’s just some more copying and pasting involved, but very precise copying and pasting.
So, basically I couldn’t get the credentials manager in Power BI to work for me, so I had to (with the help of a few questions on the Tech Community) come up a way to send in the credentials in the API call itself. It’s not good practice to put a username and password (I had basic authentication, remember) directly into code, so a quick and easy way around this was to use Base64Encode.org to create a hashed string for me to use.
It seems scary, but let me break it down as much as I can. If you are using Basic authentication, aka a username and a password, this method will work for you. (If you are using Anonymous, I don’t even know why you are here, you should already be 5 steps past here, you lucky duck!).
Take your username and your password and paste them into the Base64Encode website in one string, formatted as:
username:password
No spaces, just username colon password. Click ENCODE and it will give you a string of what looks like gibberish characters. Copy those into Notepad or OneNote to paste into your Header we are going to build.
Now that we have your username and password encoded, we can put them into the proper authentication header format we will need for this. Paste them into this where I have “username:password”. Yours will look longer, but remember – whatever the Base64Encode site gives you in the bottom box, put that where I have “username:password” (no quotation marks).
[Headers =[#"Authorization"="Basic username:password"]])),
Once you have this string loaded in your clipboard, we are ready to insert it into your big M code block. If you are worried about this, just remember that the M code came from Power BI Desktop, and we can always get back to it again if you mess it up!
So, here’s the first 4 lines of my “sanitized for public consumption” M code:
let
    Source = Json.Document(Web.Contents("https://thisisafakeAPI.com")),
    #"Converted to Table" = Table.FromRecords({Source}),
    #"Expanded result" = Table.ExpandListColumn(#"Converted to Table", "result"),
You will put your headers code right after the ending quotation mark of your API URL, with a comma added first! So with the headers code put into mine, it would now look like this:
let
    Source = Json.Document(Web.Contents("https://thisisafakeAPI.com",[Headers =[#"Authorization"="Basic username:password"]])),)),
    #"Converted to Table" = Table.FromRecords({Source}),
    #"Expanded result" = Table.ExpandListColumn(#"Converted to Table", "result"),
Mine isn’t quite right still – I have some extra ending parentheses and commas, so take out the two spare ones and the extra comma so it looks like this:
let
    Source = Json.Document(Web.Contents("https://thisisafakeAPI.com",[Headers =[#"Authorization"="Basic username:password"]])),
    #"Converted to Table" = Table.FromRecords({Source}),
    #"Expanded result" = Table.ExpandListColumn(#"Converted to Table", "result"),
The good thing is that Power BI will also tell you if there’s something wrong, and if you get confused with all of the punctuation marks and copy/pasting, just take a deep breath and start over.
There’s one more caveat we have to work around regarding authentication. It’s the fun that never ends.
- Put that code in as a blank query.
- Click “Next” to save it
- Now is the last authentication hurdle. Maybe. Power BI will tell you this:

When you click “Configure connection”, set things up like this:
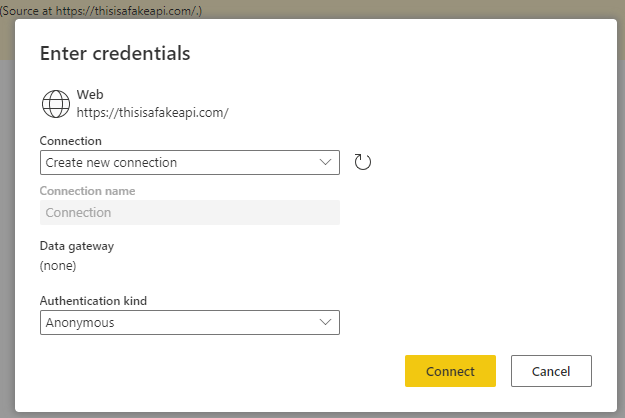
I know, it’s not actually an anonymous connection. It’s zany. This is just what I got to work.
- Click “Connect” with your settings like they are above.
- Rename “Query” on the left (or else it will show up as “Query” in your workbook and be confusing with a bunch of other “query”s).
- Click “Save and exit”.
- Save your dataflow with a meaningful name.
- REFRESH YOUR FLOW NOW. This step is not well documented and is essential. It will say “table is empty” if you do not refresh the flow first.
- Go back to the workspace home page to see if there were any errors in the data refresh. If you don’t click fast enough to refresh when that pop-up window gives you the option, this is also where you go to refresh on-demand as well.
- Go back to Power BI Desktop.
- Click “Get data” and select “Dataflows”.
- Navigate through your folders. My folder structure was Dataflows -> Workspaces -> Information Technology (the name of my workspace) -> Dataflow Name -> Query Name
And voila! Hopefully.
The Last Laugh
A fun post-script for you. This was working for my co-worker that I helped, but as I was typing this up, he was getting ready to check the queries and make sure they were what he really wanted to bring in and he got a permission error. We found the “take over” button, but then… the data flows started having refresh errors.
We did some troubleshooting, and finally, for fun, I said… let’s just have you try to connect the way you are supposed to be able to connect. The way that Andy’s blog said you can connect. And guess what, dear Reader?
It worked just fine for him.
So, I hope that this blog helps anyone who is unfortunate like me and can’t get this working for the life of them, but may you be luckier like my co-worker and get it working smoothly the way it was intended to work from the start.