
The Painful Process of Using Custom Values for OneNote Power Automate References
Posted on March 15, 2023 • 5 minutes • 968 words
Table of contents
I didn’t realize how painful this process would be until I embarked upon it, and so, Dear Reader, I’m looking to combine the resources that helped me into one place to help you if you are to find yourself in a similar scenario.
The Use Case
I was recently given a scenario where, as an important step in a proposed new process, a OneNote notebook nestled within a private Teams channel would be populated with a new page whenever a flow was triggered. The contents of that page aren’t important for what we are doing here, and oddly, neither was it important that the OneNote notebook was nestled in a private Teams channel. I thought this would be the biggest hurdle.

So, I knew that the private Teams channels names were going to be a combination of the manager and employee names. That meant that I would have to manually input the Notebook Key in the OneNote actions. That also meant I’d have to manually input the Section ID. Two seemingly simple things that were very, very not simple. I will attempt to make them more simple here (along with citations for my sources, as I didn’t solve this in a vacuum).
The Initial Flow
The first several steps of my flow were to get the names of my user and their manager (hello, Megan Bowen. It’s been a while) and combine them together in a way that made sense to me.
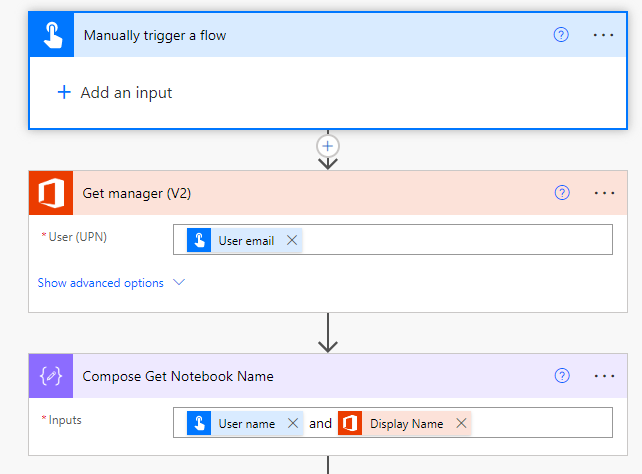
The Notebook Key
The first hurdle: the Notebook Key. This seems like it would be words, right? Wrong.
What they really want here is the URL that the notebook is at… sort of… with a little fancy stuff at the start. Nate Chamberlain’s blog got me part of the way there (hi Nate!), but whatever I was trying wasn’t working for my particular notebook scenario.
So, I cheated.
I used the “Get recent notebooks” action and got the key from there, and it was something I never would have tried, because I had to put the name of my notebook in at the end… twice?
Nate’s Method (in case that’s what works for you – replace what’s in caps with your content, spaces are okay in the notebook name):
NOTEBOOK NAME|$|https://COMPANY.sharepoint.com/sites/SITENAME/NOTEBOOK LOCATION/NOTEBOOK NAME
However, here’s where mine ended up:
NOTEBOOK NAME|$|https://lindsaytshelton.sharepoint.com/sites/Home-PrivateEmployeeManagerChannel/Shared Documents/NOTEBOOK NAME/NOTEBOOK NAME
Again, this was a notebook I created within Teams within a private channel, originally called Private Employee Manager Channel before a rename (so keep that in mind if you are just digging for a URL). I highly recommend just running that action instead of building it yourself, however, as I was having no luck.
I put my Notebook Key in a Compose action (putting it in a variable would work just as well) so that you aren’t trying to copy and paste that thing all over the place.
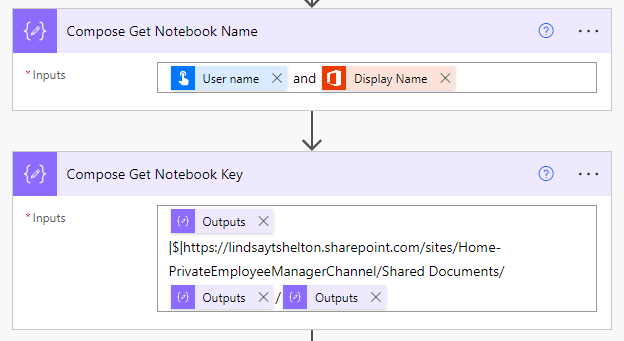
So, my first Compose action is building the notebook name (Lindsay Shelton and Megan Bowen in this case). The second references the first for every time I need NOTEBOOK NAME, and now I can reference the second Compose action every time I need my Notebook Key.
The Notebook Section ID
This was even more annoying than the Notebook Key, if you can believe it.
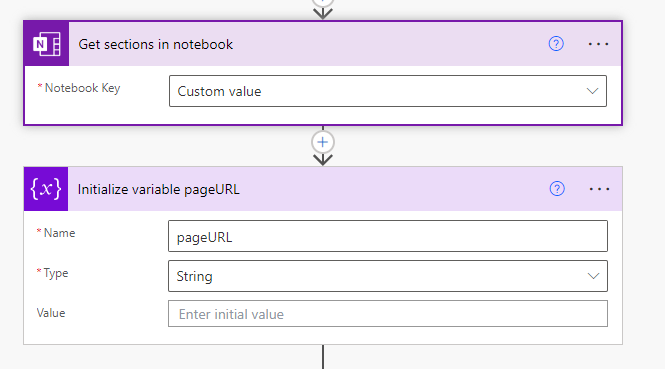
Run the “Get sections in notebook” action using your new Notebook Key.
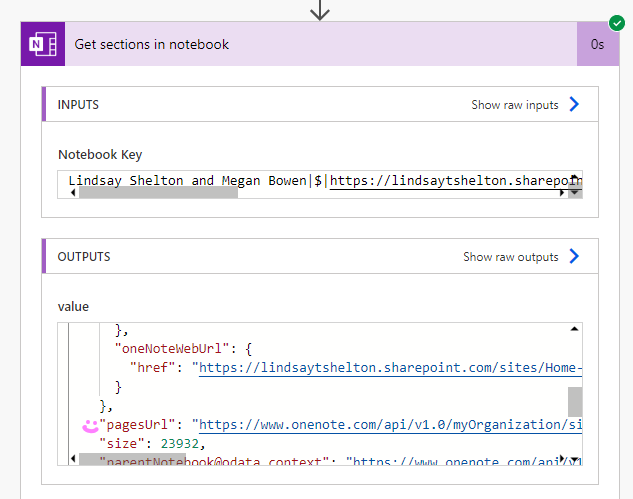
The value you want to grab and reference is super intuitive.

Anyway, you want to grab the “pagesUrl” value. Yes, it’s another URL, but an actual URL this time.
That’s the short version. Here’s the longer version of how to use that value, modified by me but thanks to an anonymous poster on the Power Users forum.
You want to initialize a new variable called pageURL. It should be a string, and leave it blank for now.
This is the most complicated part, but bear with me.
Make a Condition, and set the “Section name” dynamic content value as equal to whatever your section name is called. Mine is called “Goals and Actions”, so I just set it equal to that string.
We aren’t going to use the “No” side. In the “Yes” side, add a Parse JSON block, and paste in this JSON:
{
    "type": "object",
    "properties": {
        "pagesURL": {
            "type": "string"
        }
    }
}
Set the “Content” in that JSON block to “Current item”. So far, it should look like this:
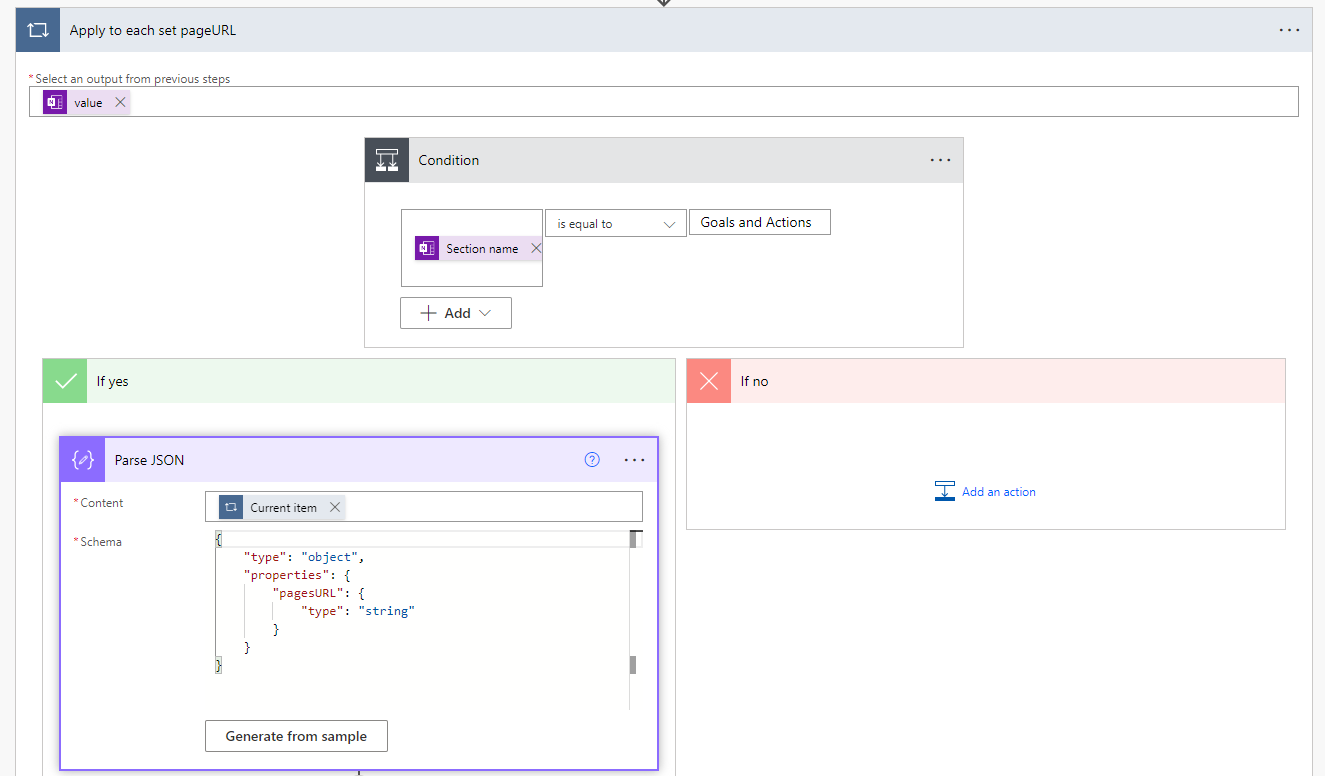
That’s the hardest part! Still in the “Yes” section, right after Parse JSON, add a Set Variable block. Set your “pageURL” variable to the value of “pagesURL”, which should be new dynamic content available to you after you have added the Parse JSON block.
Can We Make A Page Yet?
Yes, yes we can! Add one more block – Create page in a section.
You will want to select “Custom value” for both the Notebook Key and the Notebook section. Remember, the Notebook Key should be that second Compose block if you set yours up like mine, and the Notebook section should be your pageURL variable.
Once you run it, you should see this!
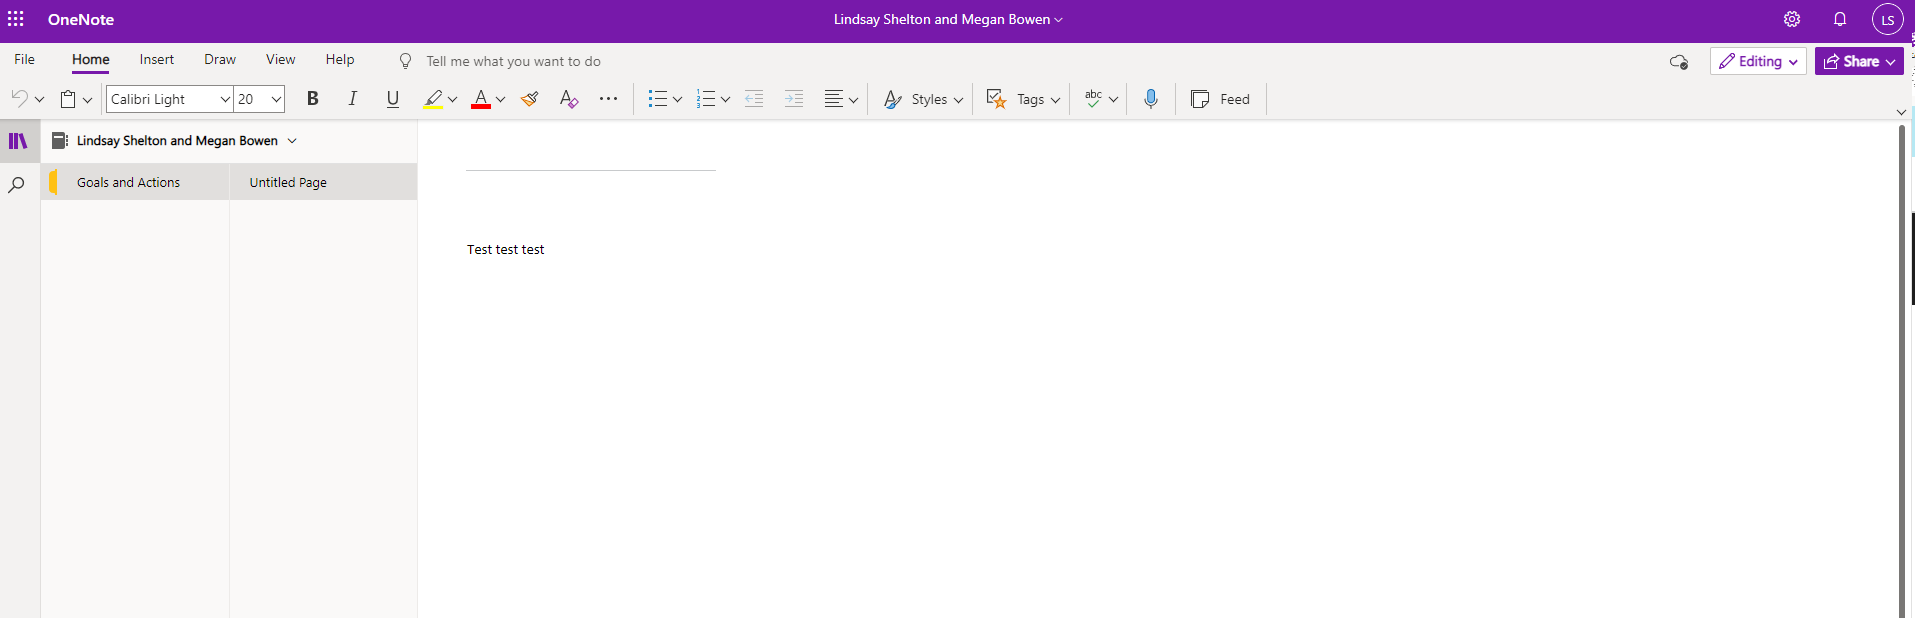
…except there’s no page title, what the hell?
Fine, Let’s Add a Page Title
We made it hard enough to just add a page, why not go one step further and give it a title?
Out of the box, you can’t give the page a title. So, we have to rely on a little HTML styling. Click on the Code View button (circled below) in the Page Content section of your last action.

From here, we need to add some basic HTML to get a title. Here’s the code I used, and then you can see what output it gave me.
<html>
<head>
<title>New Goal</title>
</head>
<body>
<p>Test test test</p>
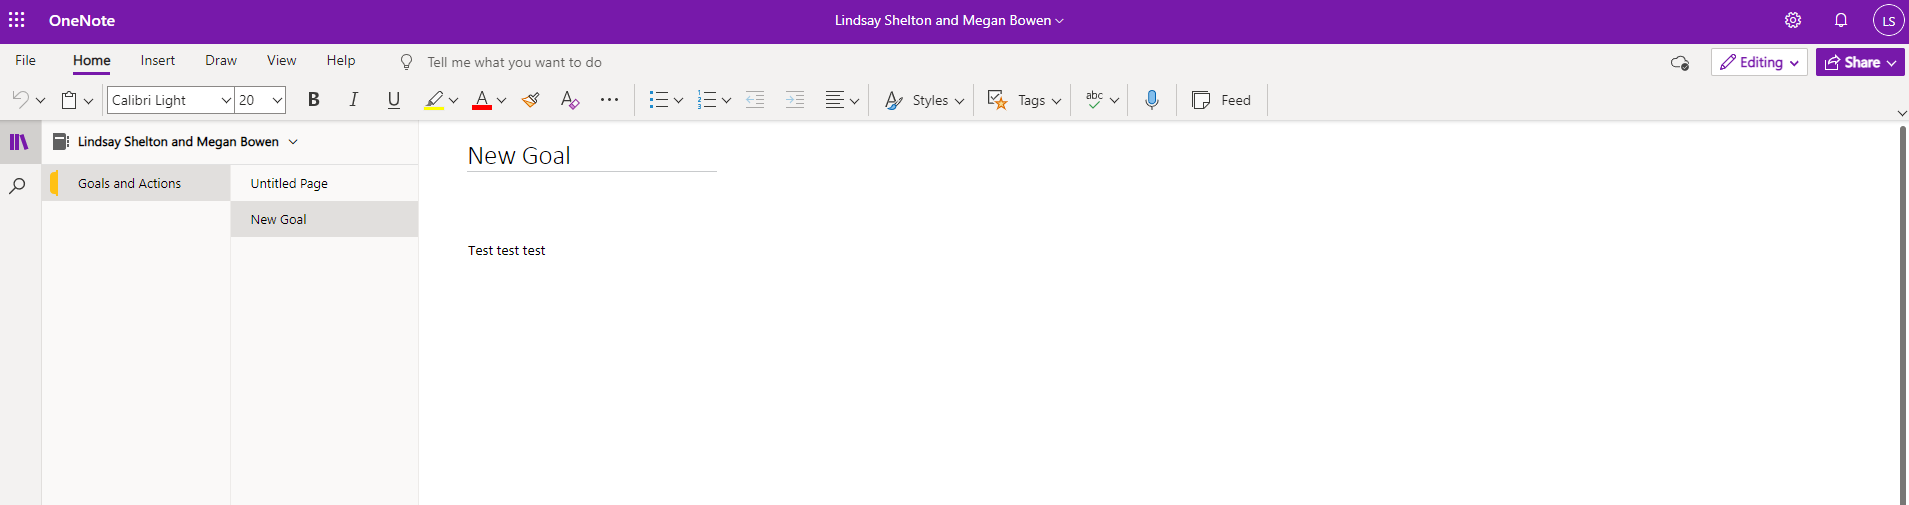
So, get creative with it – I’m sure I will as this project rolls along, but that’s the basics of it!