
The Power of Loop: A Surprising Twist in Task Syncing
Posted on December 4, 2023 • 10 minutes • 2042 words
Table of contents
Spoiler alert: this blog post has a twist ending that you will NEVER see coming! Okay, maybe you will see it coming if you’d paid attention to some of Microsoft’s newer tools, but I’m getting ahead of myself.
The Use Case
I had a user come to me asking for help building her first Power Automate flow, and what she wanted was pretty ambitious for a beginner. So, I jumped in and helped build out a POC based on her use case.
She has a small team that meets weekly to go over the tasks they have assigned in Planner to discuss their progress and make additional notes as needed. So far, she’s just been copy/pasting the tasks from Planner into OneNote, but she was looking for a way to automate getting the tasks due in the next 7 days flowing from Planner into OneNote. A stretch goal was to have the two be synced (mark one as done in OneNote, it shows up as done in Planner), but we’ll get to that at the end.
A Thought About Power Automate Copilot
I tried to use Power Automate Copilot for help on this, as a side bar, and it’s… not ready for primetime. I was asking it to help me write an expression using the date input I’d added to the manual trigger, and over and over again, it just kept removing the input I added instead of helping me write an expression referencing it. Stick with ChatGPT for now - I had a lot more luck there, and it did the heavy lifting for me when it came to writing expressions.
The Initial Power Automate Solution
Yes, you read that right, the “initial” solution because there is, as teased, a TWIST ending!
So my goal was to build a Power Automate flow that would ask for a date as the input on a manual trigger flow, check the current values for Planner and OneNote, then just return inside of OneNote the tasks due in the next 7 days (from the date picked when the flow was started). We hadn’t gotten into who was assigned what task before this idea was ultimately nixed, but I wanted to share what I got working regardless. Feel free to enhance it (with the aid of ChatGPT even!) and share a further-completed solution - I’d love to see it!
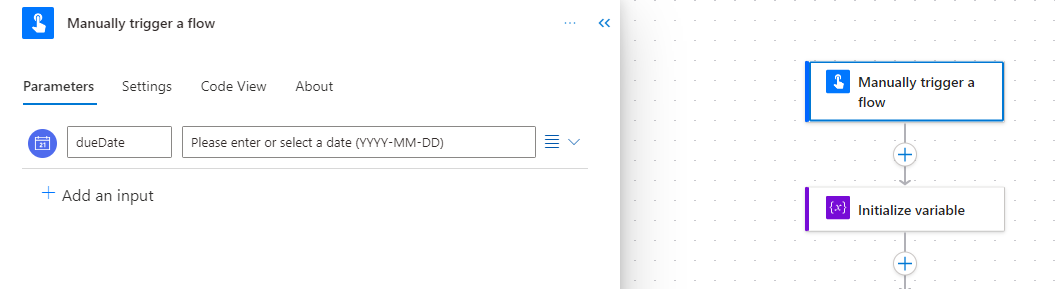
We start the flow with an instant, or manual, trigger. I added an input and for the type of user input, I selected “Date”. That will give you what you see here, with just a slight modification to the name of the input.
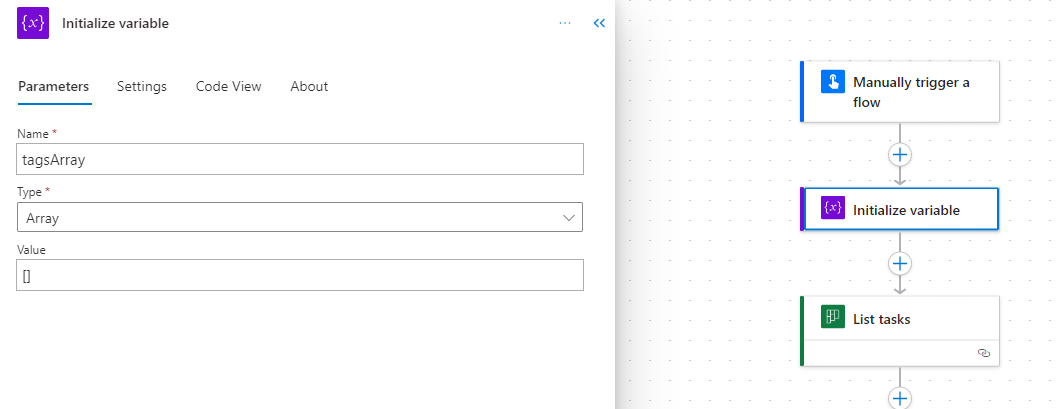
Next, I initialize an array variable that I called “tagsArray” for some reason instead of calling it “tasksArray”, but I’ve gone too far to change all of the variable references now. I just put in empty brackets for the initial value of this one.
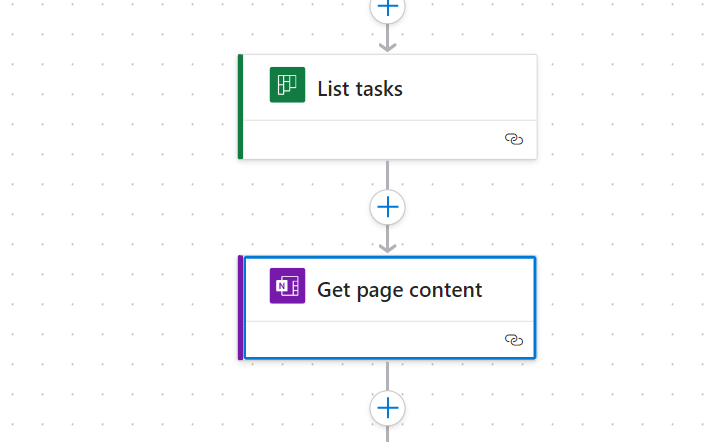
For the next two steps, I needed to get the values from both Planner and OneNote so that I could work with their dynamic content later in the flow. So, I used the following two actions, the first from Planner and the second from OneNote:
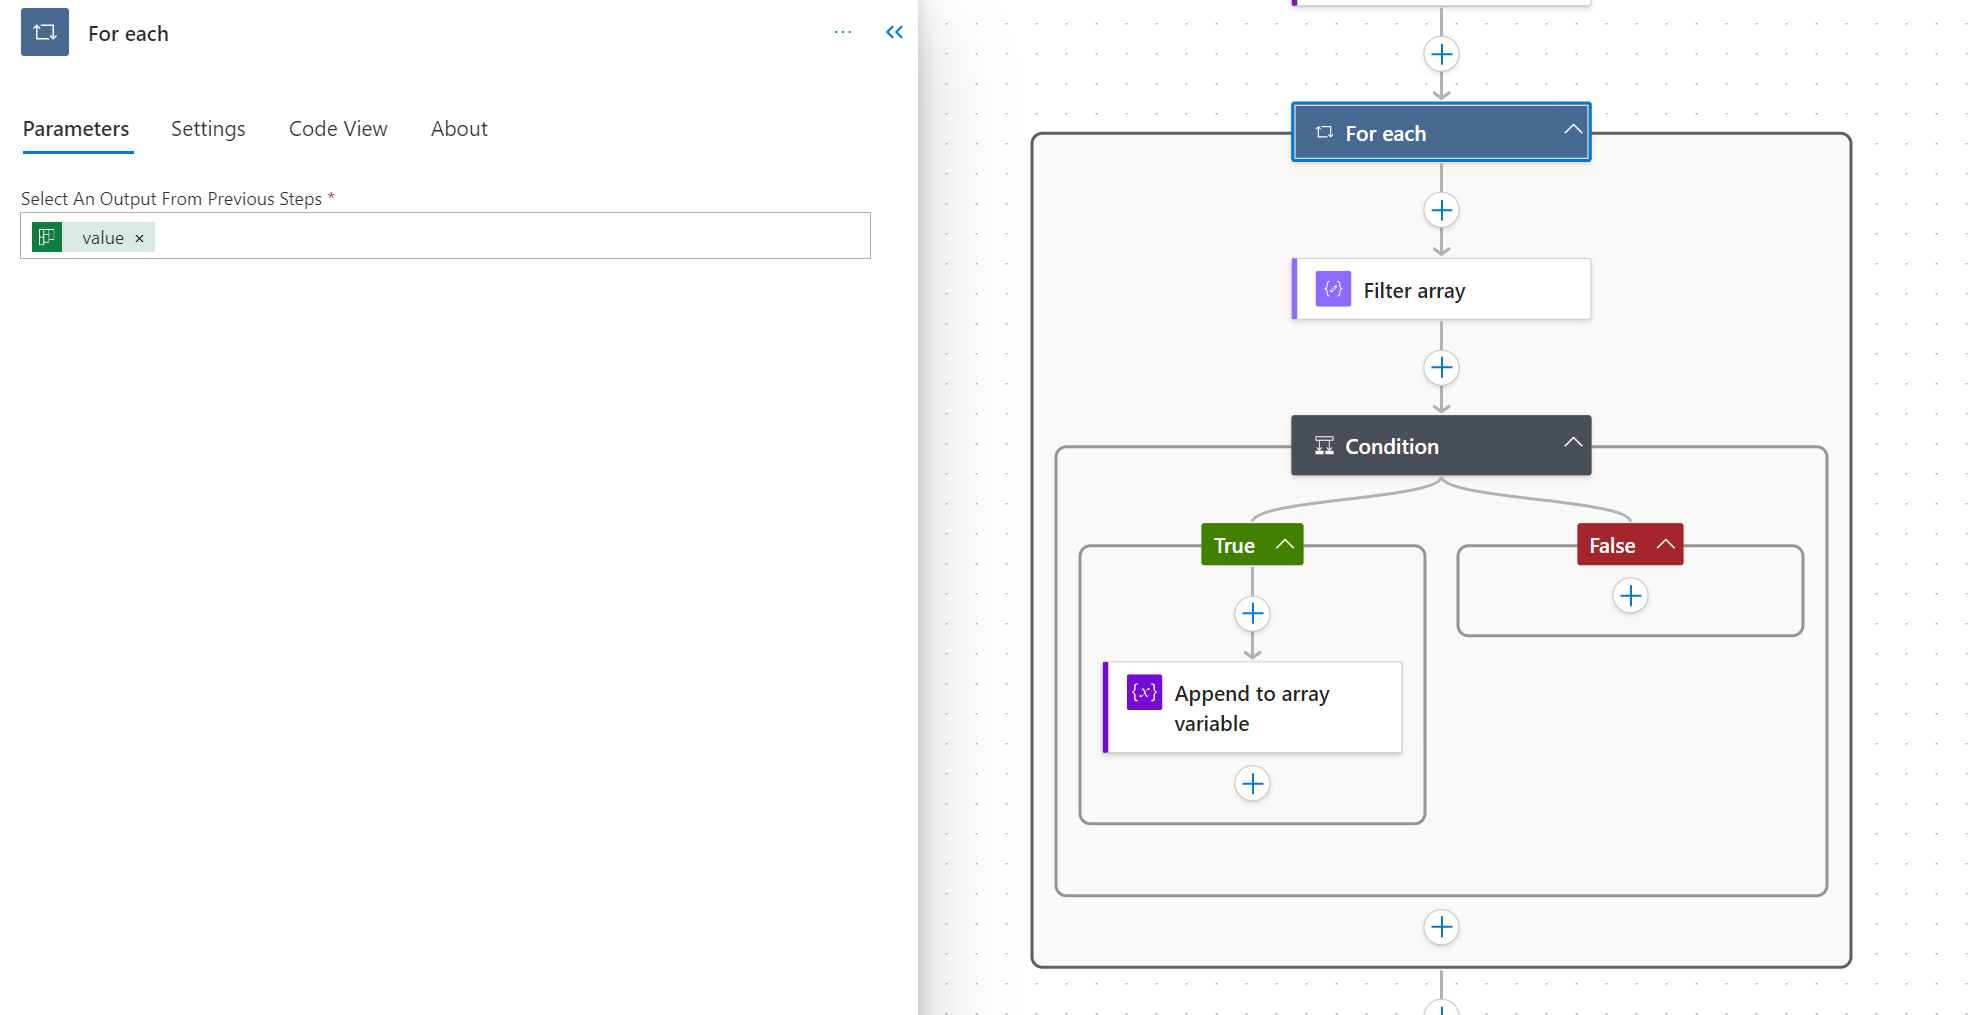
Now we get a little fancy for the next step. You will want a For Each conditional surrounding the action called Filter Array. For your output from previous steps in the For Each loop, select the “value” output of the Planner action, as that’s what we are going to be filtering.
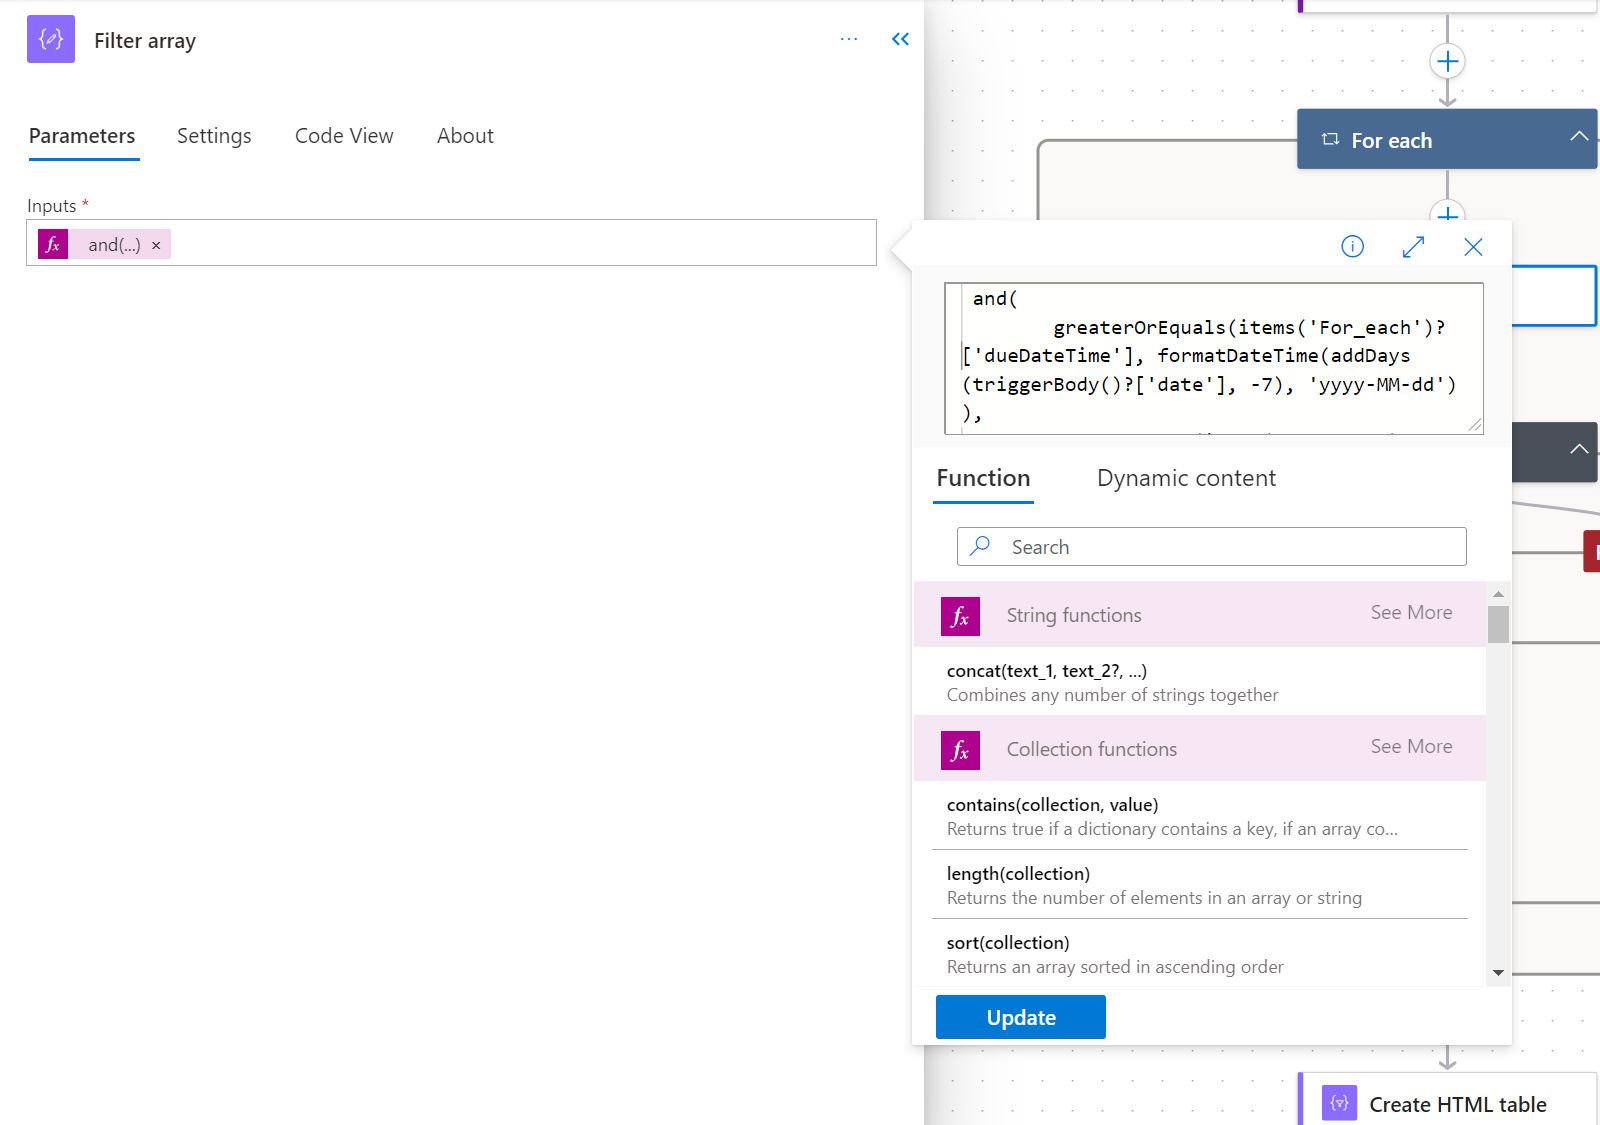
In the Filter Array action, this is where we ask Power Automate to evaluate the tasks in Planner to determine if they are within that 7 day window or not. ChatGPT helped me with this formula - adjust your dynamic content reference titles as needed. If you wanted a different window than 7 days, change the “-7” value:
and( greaterOrEquals(items(‘For_each’)?[‘dueDateTime’], formatDateTime(addDays(triggerBody()?[‘date’], -7), ‘yyyy-MM-dd’)), lessOrEquals(items(‘For_each’)?[‘dueDateTime’], formatDateTime(triggerBody()?[‘date’], ‘yyyy-MM-dd’)) )
To put this formula into the “inputs” window, in the new designer, select the bottom “Fx” icon in the blue button that pops up to the right of the inputs field.
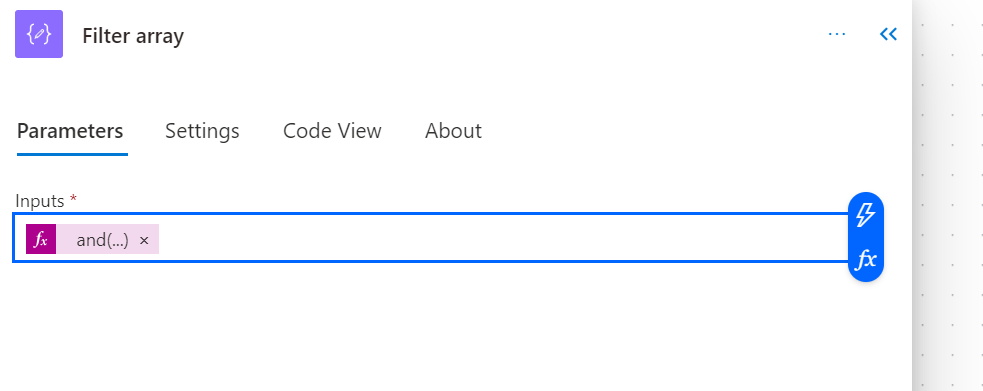
Then when you have the Formula window available, paste in the expression and click the blue “Add” or “Update” button.
What this generates, if left alone, is actually a list of boolean responses, so mine returned “true,true,true,false,false,false,true,true” left untouched. What this is referring to is whether or not the checked task fits into that 7 day window that we set up using the trigger input date and the value “-7”.
Next, to deal with these true/false responses and to pull out all of the info we want for each task. Add a Condition, still inside of your For Each loop. The condition should be set to, on the left, the output value from the Filter Array, like in this screenshot:
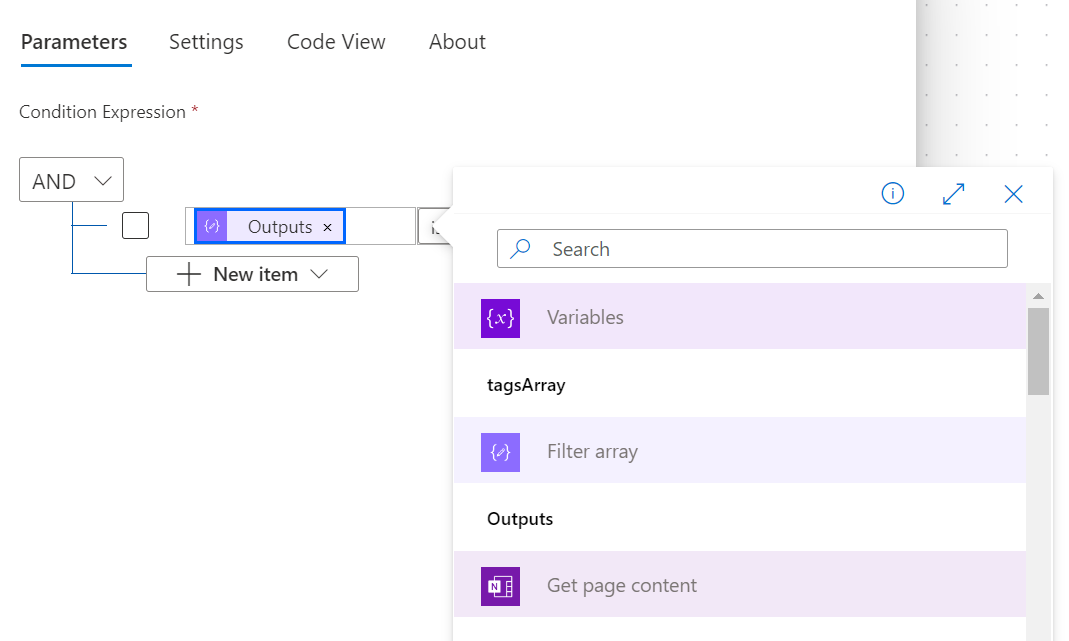
The middle choice field should be set to “is equal to”. For the right side of the condition expression, go back into a Formula editor by clicking the “Fx” blue button again, type in the word “true”, and click the blue “Add” button.
We will leave the “False” value blank. In the “True” side, add the action “Append to array variable”. Select your one array variable you’ve made, tagsArray, for the name. For the value field, you can put in whatever you’d like from the “List tasks” Planner action dynamic content. To access that, click the lightning bolt top spot in the blue button, which opens the dynamic content window.

I have mine set to “title”, a comma, and then the “dueDateTime” of the task.
So now we are getting the values we want (at least we hope so!), but we need to display them in OneNote. Outside of the For Each loop now, you can do a few different things that I’ll walk you through.
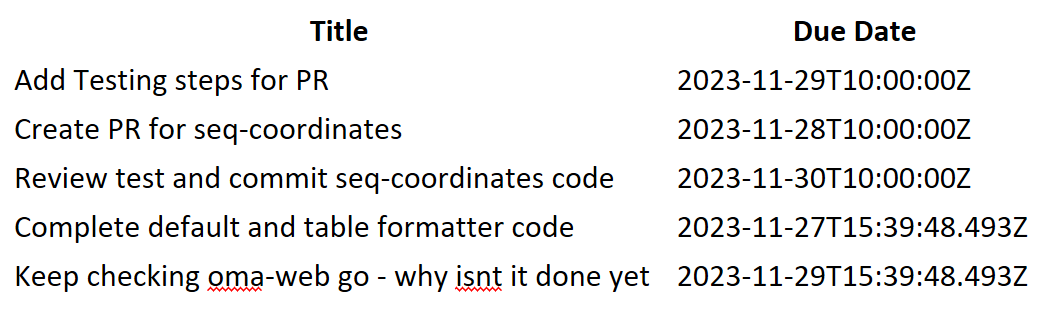
If you want your values just arranged into a table for readability, which I’d recommend if you are selecting multiple values from Planner to display, add the Create HTML Table action. For “From”, select your array variable, tagsArray. Then select to add a parameter - your only option is “Columns”. There’s then a second dropdown that will appear, asking if you want the columns to be “Automatic” or “Custom” - click “Custom”.
You can then add rows for each header - so in my case, I’d add a row that says “Title” and a second one with the header “Due Date”.
For the value side, we are going to just keep it simple and go with a split function that splits on the comma that I put in the value getting returned. Note that this won’t work if you are putting commas in the tasks in Planner. If that’s the case, change the punctuation type that separates the title and due date and then update the formula’s “,” accordingly. The formula for the first value is:
split(item(), ‘,’)[0]
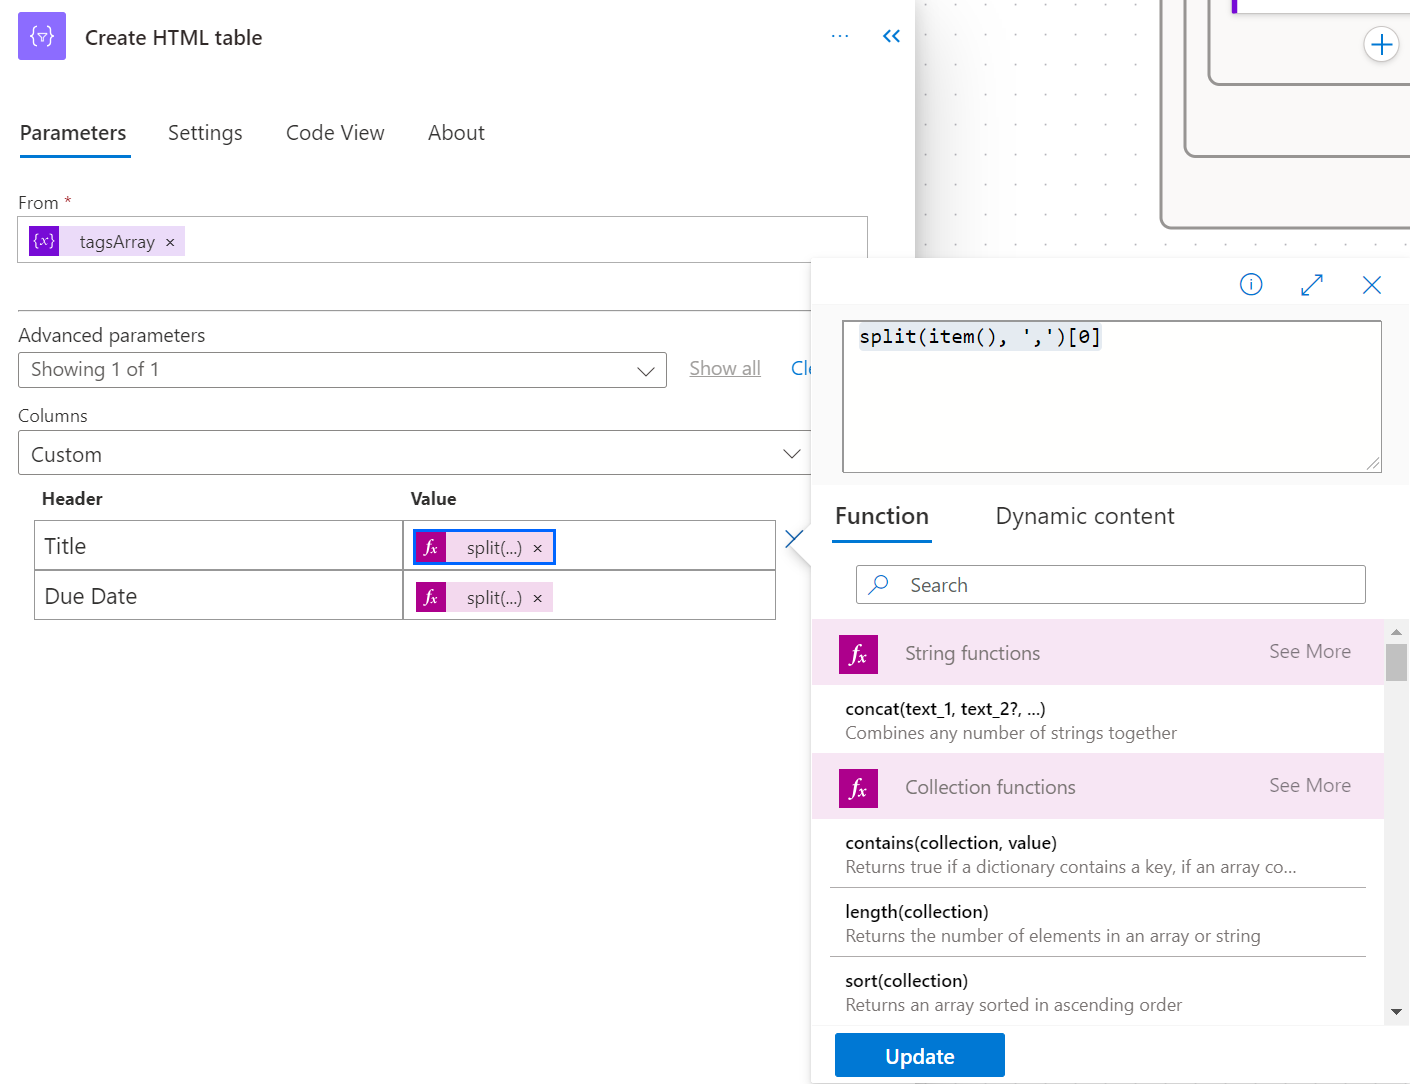
Each successive value can be accessed by changing that [0] to a [1], [2], and so on. So for my two headers, I have a split[0] for the title and split[1] for the due date.
My output in OneNote ends up like this:
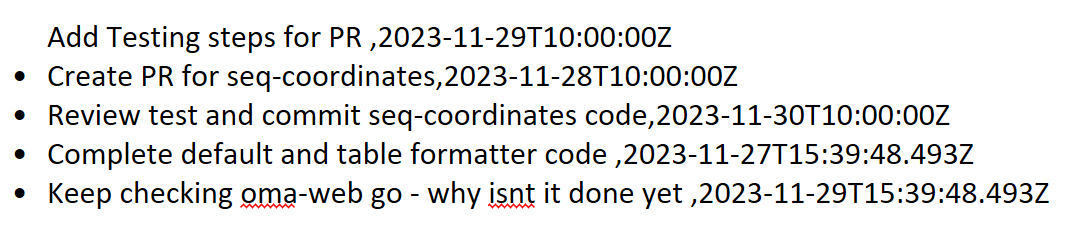
Another option is to put the values into a bulleted list. I tried repeatedly to force OneNote to use To-Do boxes instead, but I didn’t figure out a way. If this is what you want to do, use the “Initialize variable” action, call it something like “bulletedList”, set it to “string” as a type, and put in this formula:
concat(’
- ’, join(variables(’tagsArray’), ‘
- ‘), ‘
This will build an HTML list, though one bug of this method is the first item in the list doesn’t get the bullet for some reason. The output of this method is this:
So, how do we get this output into OneNote? Add one more action at the end, after either your HTML or your Initialize variable action - it’s a OneNote action that’s called “Update page content”.
There is certainly more toying around with this action possible than I’ve done, so here’s a resource I was starting to look at regarding this action: https://github.com/microsoftgraph/microsoft-graph-docs-contrib/blob/main/concepts/onenote-update-page.md
Based on this, I decided to just say that I wanted to append my value to the end of the body of the OneNote page. These are the settings I used (after selecting the advanced parameter “Update”):
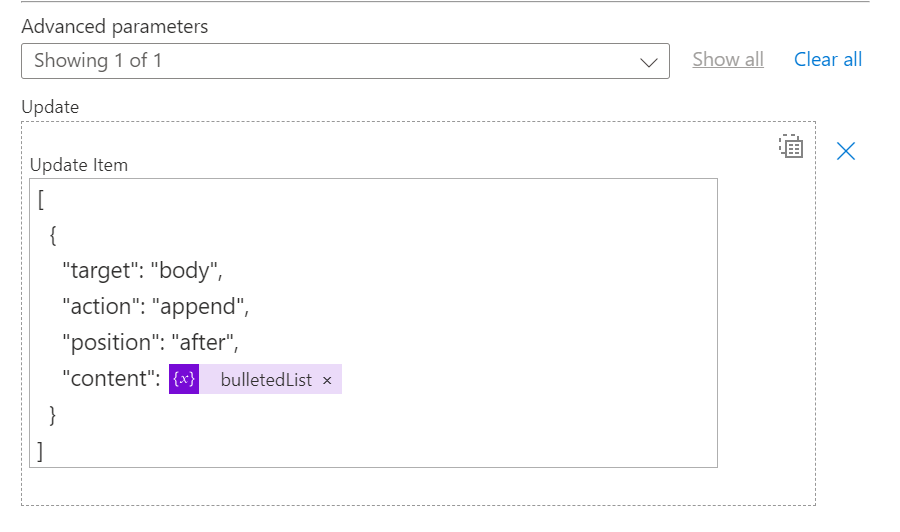
For “content”, you will notice in this screenshot that I have the “bulletedList” variable. If I instead built the HTML table, you’d put the output dynamic content of that in as the content.
I’m sure there are ways to target a different spot on the OneNote, but I didn’t get that deep into it. These settings will put your output of choice at the bottom of your existing OneNote notebook content.
And that’s it! There are loads of options for building onto this or modifying it to suit your needs, but this got a basic proof of concept going.
The Decision
…you thought I was done, didn’t you? Did you forget about… the TWIST?
I met with the user and showed her these options, and she thought it was a good start, but had a pretty obvious, but not easy, ask - when you check things off in the OneNote, would they sync to Planner?
The short answer is no.
The longer answer is that I’m guessing you could figure out something with another Power Automate flow, but we are getting pretty heavy headed at this point. I literally said in this meeting, “What we need is a widget… that just can exist in OneNote…but is connected entirely to Planner!” and then it was almost like an actual lightbulb went off.
Microsoft Loop was a widget that connected to things, from the little attention I’d been paying to it. So live on the call, we pulled up Loop and started playing around.
The Twist Ending
Sure enough, it seems like Microsoft Loop will do almost exactly what the user was looking for without Power Automate’s intervention at all!
So, what we discovered started with going to https://loop.microsoft.com/ and clicking the plus sign button in the top righthand corner.
I have yet to figure out how to make a table in Loop, so you can use a template to build a task list and then, one day in the future, per this post https://techcommunity.microsoft.com/t5/microsoft-365-blog/microsoft-loop-built-for-the-new-way-of-work-generally-available/ba-p/3982247 , you will be able to insert it into a OneNote page. However, there’s an even better option.
Open up a blank page in Loop and then go to your Planner plan. Copy the URL of the Planner page. Come back to Loop and paste that link in. Then voila - magic!
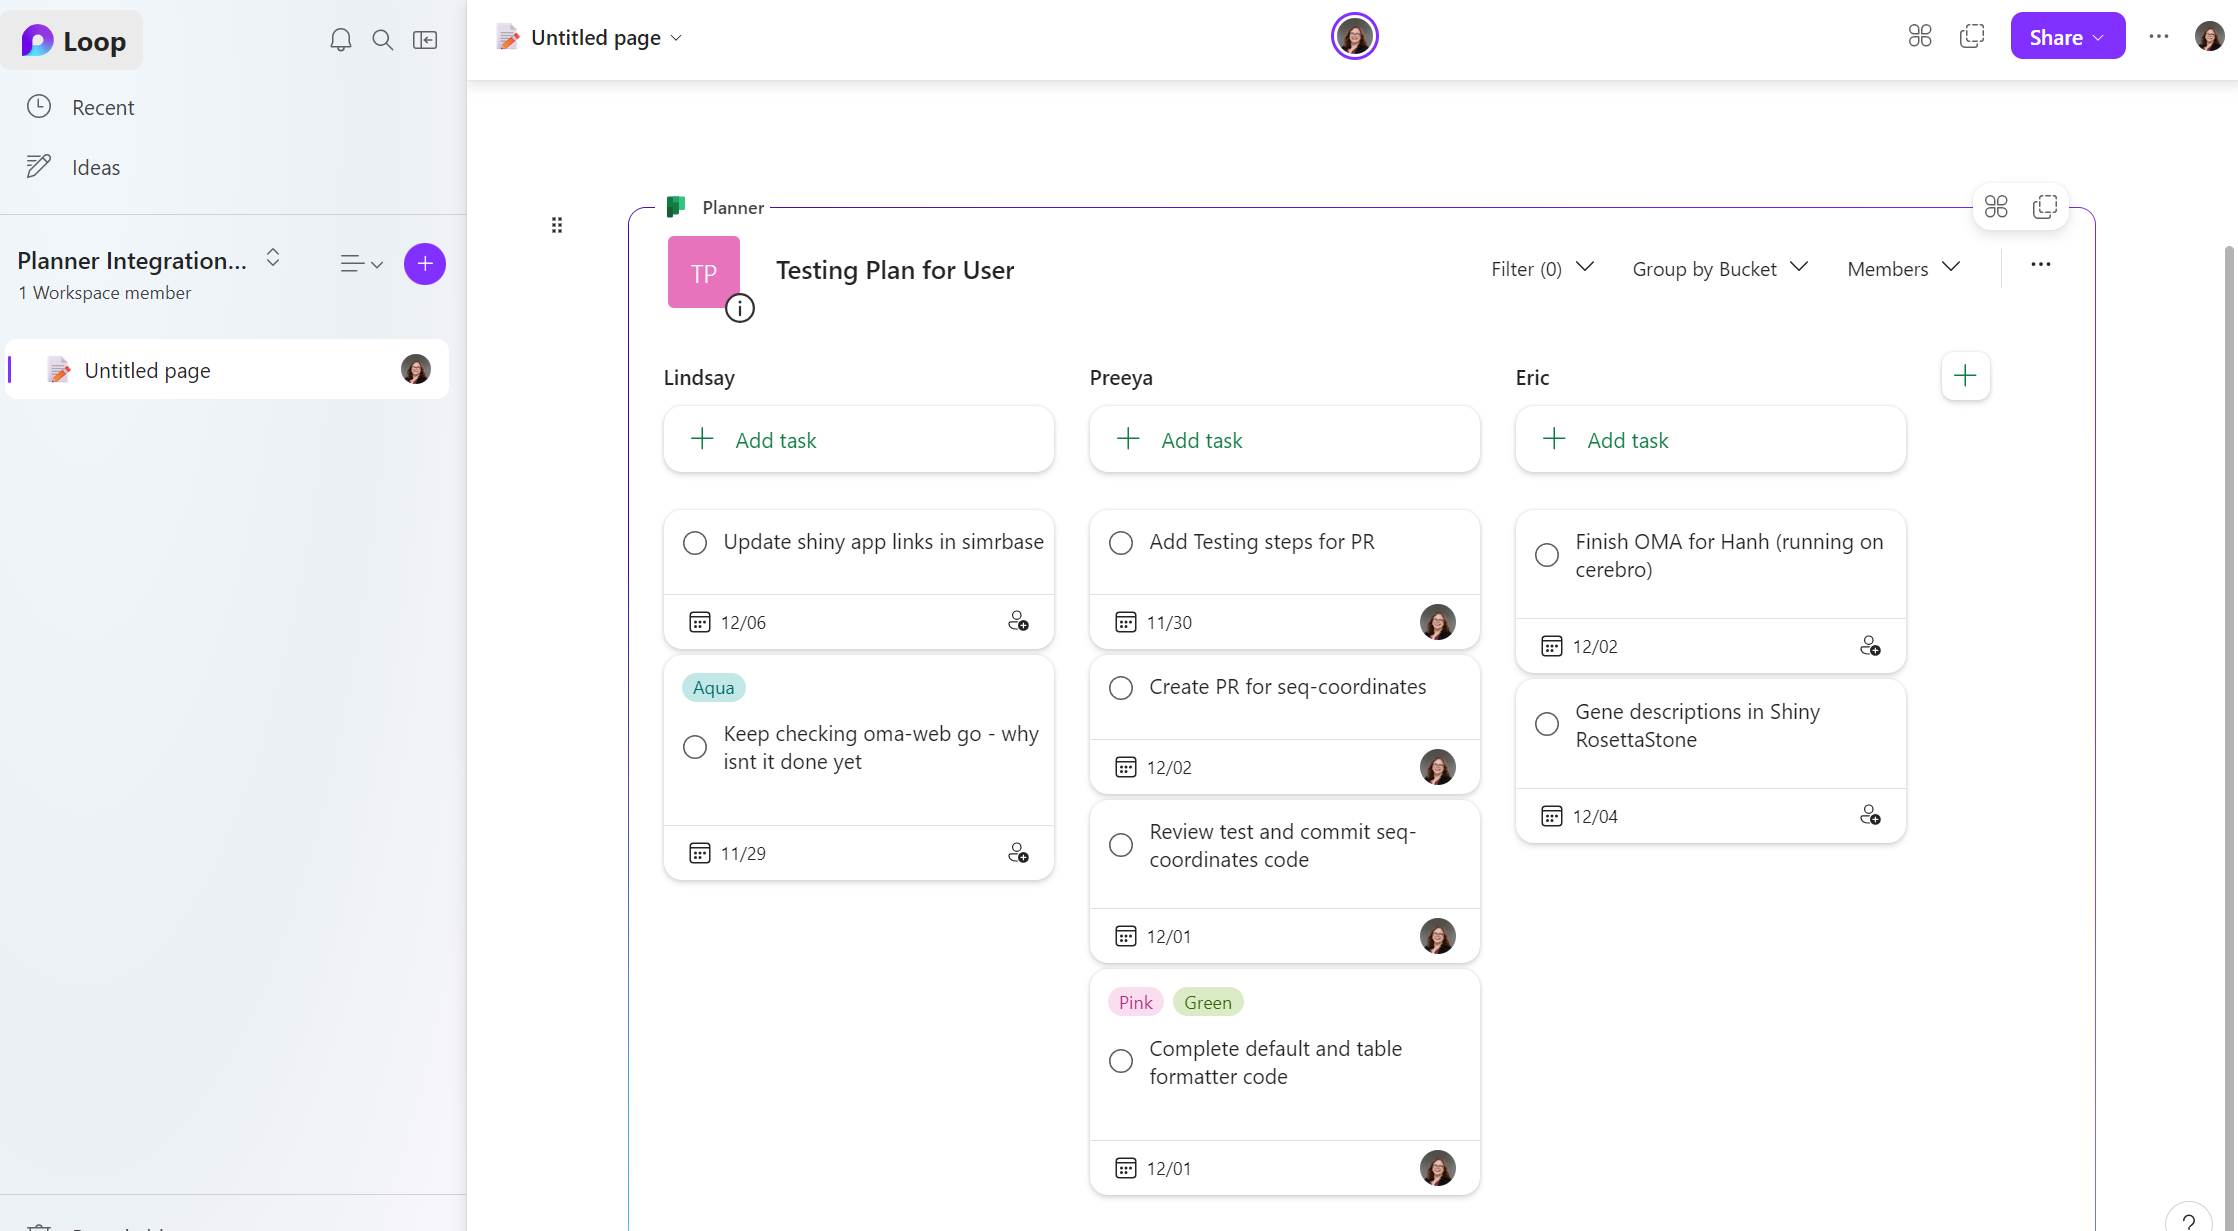
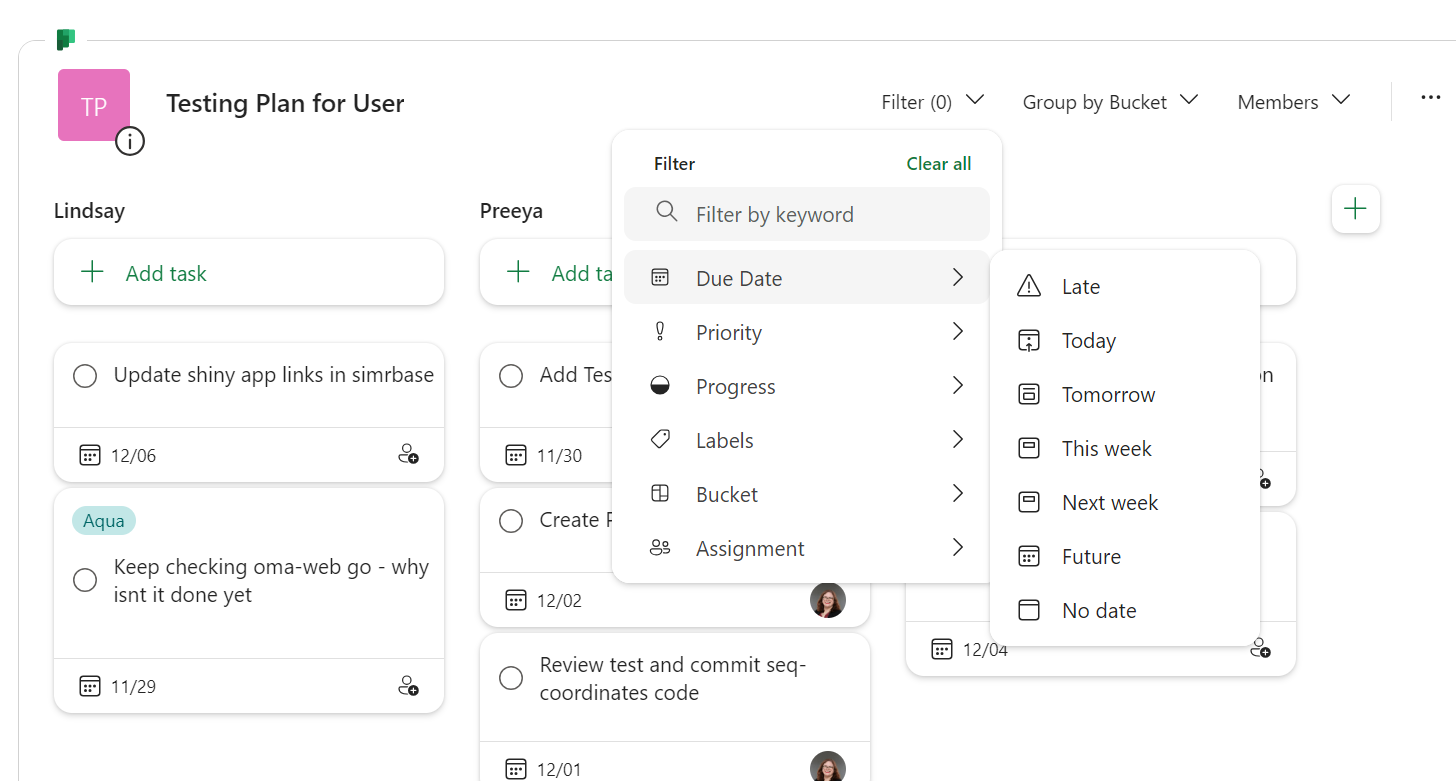
The entire Planner dashboard just appeared inside of my Loop page! It stays synced, too - if I mark a task as done here, it shows as done in Planner and vice versa. I can also filter this Planner dashboard to just see tasks due this week or tasks that are late, for example.
Then, around this Planner Loop component (I might not have the verbiage right there), you can type everything you’d be typing in OneNote to add additional details to your task review sessions.
In Conclusion
In the end, my user was pretty excited along with me about the capabilities of Loop for collaborating while tracking tasks. It’s still pretty new, so there are cons, like very little integration with Power Automate for Loop at the time I’m writing this blog, and it was hard recommending a solution that I came up with while I was on the call. I’m not writing off that Power Automate solution, either, and I think it has its potential uses beyond my original use case.
So, in short - try out Loop if you are looking for Planner integration that syncs, and try out Power Automate if you are more interested in a stagnant version of your task lists that is much more customizable. Happy adventuring!
An Update!
I asked the Microsoft Loop Twitter about why the special twist wasn’t working for everyone (as of 12/7/23), and they said the following:

So, if you are having trouble with the special twist and don’t have an enterprise license, that’s why! I’m not sure if this is a temporary thing or not, but I’ll update this post if I hear anything else.