Using Row-Level Security in Power BI and Power Automate
Posted on January 5, 2024 • 8 minutes • 1565 words
Table of contents
Power BI is not my normal wheelhouse, but when duty calls, I answer. I was recently asked to help update a report in Power BI that does all sorts of SQL calls to a database - how all of that works is a mystery to me. However, we were managing security by updating 19 different reports, one for each lab. This was a nightmare to maintain and update, as I discovered when my job was to go in and update all 19 of those reports. Enter row-level security, my new best friend. Read along to see how we implemented it and how we then used it in Power Automate to send out security-trimmed PDFs to our users on a monthly basis.
The Use Case
As I said, this report was not my original brainchild. It shows each of our 19 labs information about their storage - how much data are they storing, what does it cost, and a list of files that haven’t been updated in 3 years that might be prime targets for archiving. This information is meant to be private to each lab - they should only see their own data.
This was working alright in 19 different reports until it was my job to go into each of those reports and add a new data source that allowed for better, more accurate targeting of what files were owned by which lab. I actually did go and update all 19 reports, but we started running into problems when I began publishing them - the modeling was getting messed up and all sorts of other things that are above my pay grade. So, we decided to move to a single report that would be filtered by the lab that was viewing it. This is where row-level security comes in.
Implementing Static Row-Level Security in Power BI Desktop
Per my research, the method I’m using here is called static row-level security, or RLS. You can get more advanced and go with dynamic RLS, but that wasn’t necessary for our use case. Part of that decision comes from how often you need to update who has the rights to what, which wasn’t going to be often for us. We also have the benefit that there are automatically maintained security groups in Azure that contain the users I’d want to have the access, so I can just use those groups to manage the security.
To get started, click on the Modeling tab in Power BI, and click “Manage roles”. This will open the row-level security editor, though keep in mind - this is just PART ONE. There is a second component you will need to do, so don’t just set things up here and think you are done!
You will need to decide what value you can filter on that will restrict the information correctly. For me, even though I have multiple data sources, they each have either a “zone” or a “zone_name” column that I can build RLS on. This is going to differ based on each use case, but just keep in mind that you can have multiple column filters set up like I’m doing here.
First, I press the “Create” button and give the role a name. I’m going to name my first one after my first lab, “Bazzini”. You can see that I’ve got a list of tables available to filter on next to my Roles list. Click the three dots and hover over “Add filter” to see what columns are available to filter on for that table.
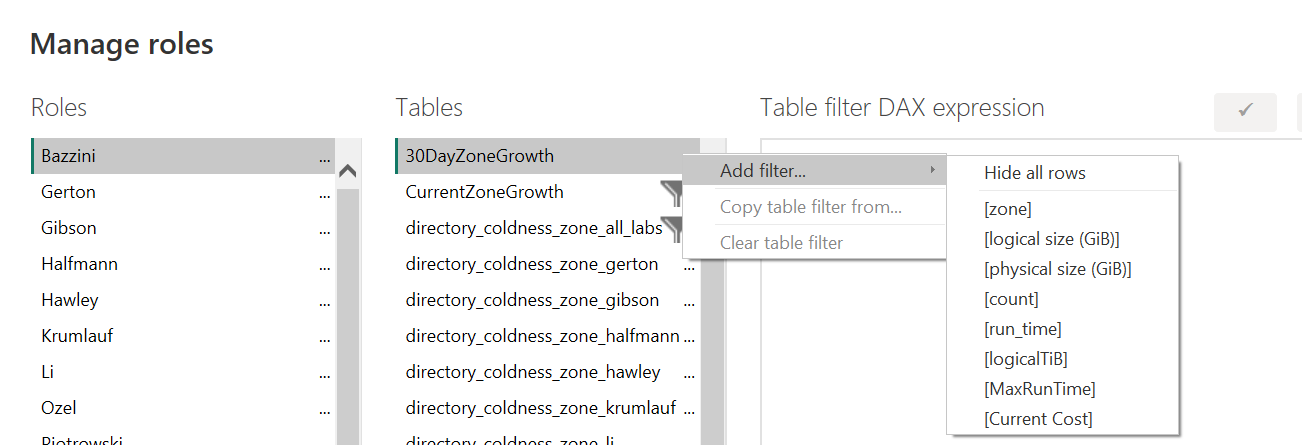
I’m going to filter on the “zone” column, so I click that to add it to my DAX editor/filter list. Basically what this is doing is helping us write a DAX expression to filter on, with the default value of, shockingly, “Value”.
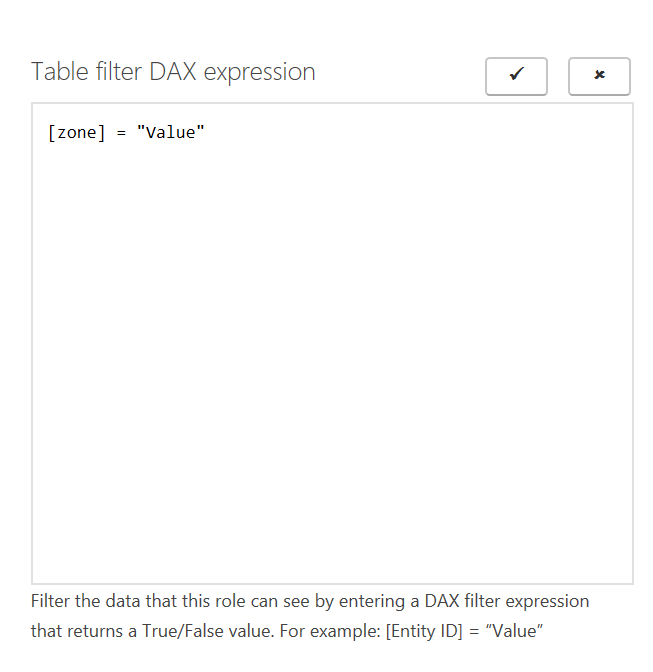
All the DAX writing you have to do is change “Value” to the name of your value you want to filter on - in my example, I’m going to change it to “bazzini” (it is case sensitive, I believe).
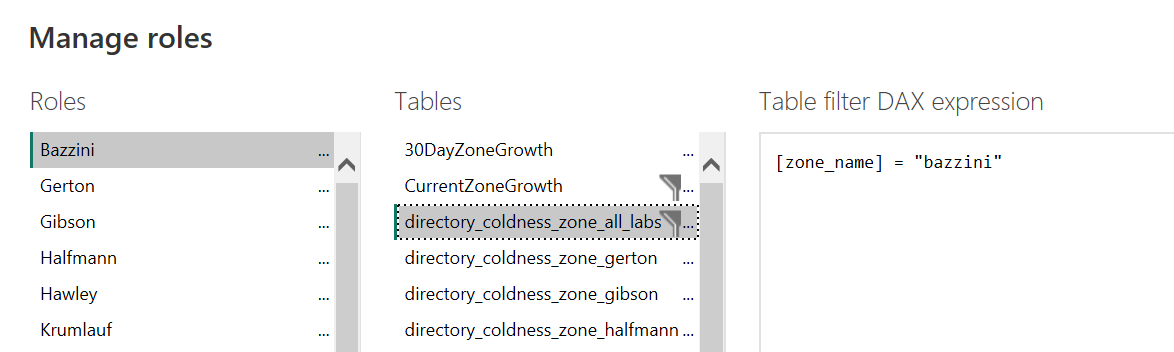
You can add more than one filter on each table by repeating this process. It will add to your DAX editor as “&& (new filter)”. You can also filter based on more than one table, which is what I’m doing. Notice in this screenshot that there are filter icons on two of the table names - that’s because I am filtering one table for “zone” and one table for “zone_name”, based on the data source.
Now I have a lot of filters to set up, but Power BI makes it pretty easy on me. When I go and make a new lab, notice that one of the options when you click the three dots is “Copy table filter from…” and it gives me a dropdown of all of the other roles I have created. Just select one of them and simply replace one value for the new value you need to filter on. I just have to do it twice for each new role I build since I’m filtering on two tables.
If you want a role that can see everything, simply create the role and then don’t add any filters. They will be able to see everything as if RLS wasn’t even turned on.
Make sure to hit “Save” at the bottom when you are done building up your roles for now.
A Note About Trust Issues, aka Testing These Out
It can be scary trusting new things, and it can be especially scary when condensing what was 19 separate, private reports into one mega report. Power BI has things to help us there, too. Notice that button next to “Manage roles” in the “Modeling” tab that says “View as”? That lets you test out the restricted view of the report through the eyes of any of the new roles you’ve just built. So, I can click on “View as” and then select “Bazzini” and see what the report looks like to someone who has that role.
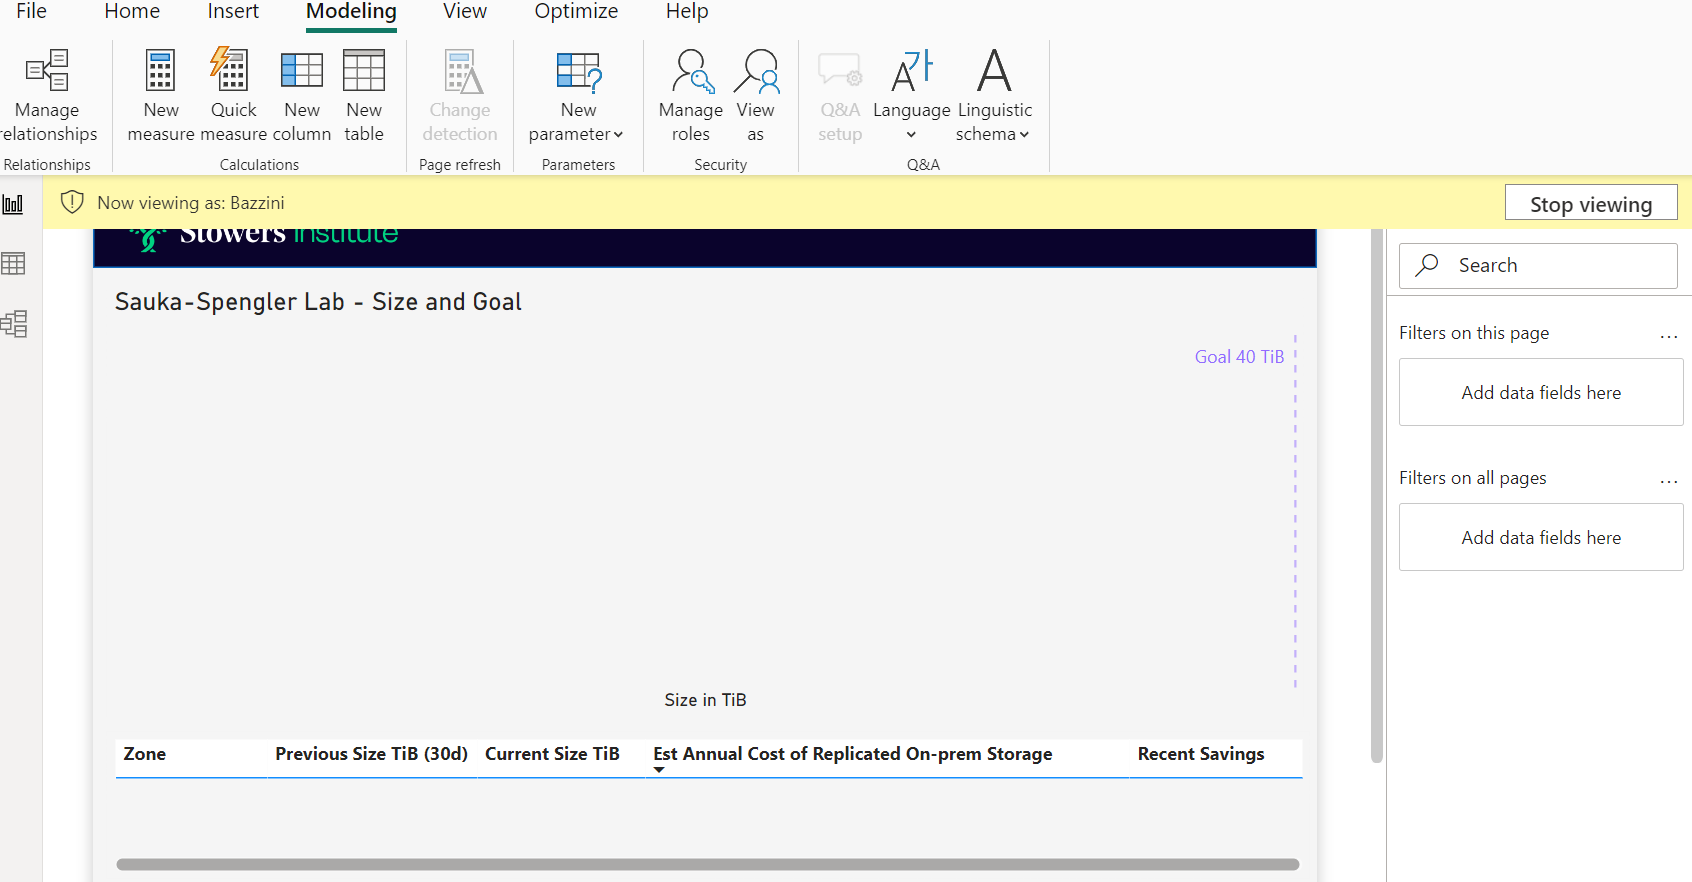
So now that I’m viewing this new tab I just built, Sauka-Spengler, as someone with the Bazzini role, I can see just what I think I should be seeing, which is no private data for any other lab. I can also test out the other roles I’ve built to make sure they are working as expected, which I tend to do as I build each one just to make sure I’m not missing anything. Simply click “Stop viewing” when you want to go back to viewing the report as yourself.
Implementing Static Row-Level Security in Power BI Service (Power BI on the Web)(AKA Part Two)
Now, you aren’t done yet, as I mentioned. Publish your report and go to Power BI on the web.
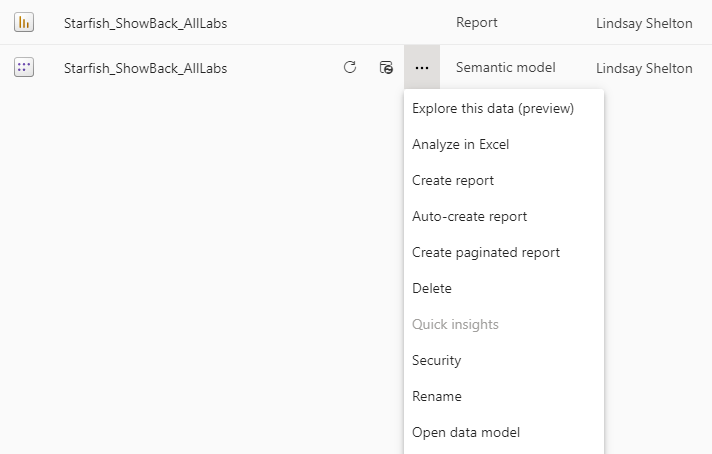
In your workspace that you’ve published to, next to your report, you should see another item that has the same name but is of the type “Semantic model”, like in this picture. Click on the ellipses in that row and click “Security”.
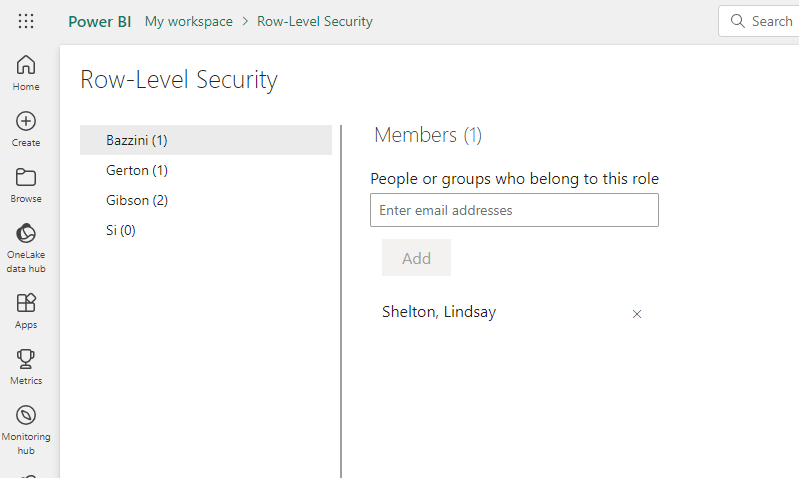
You will be taken to a new page that lists all of your previously defined roles. Click on the first one - “Bazzini” in my case - and then start typing in email addresses for individuals or groups (any type BUT M365 groups!) that you want to have access to what this role can see and click “Add” after each one. Make sure to click the “Save” button at the bottom of the page before you go to add people to another role.
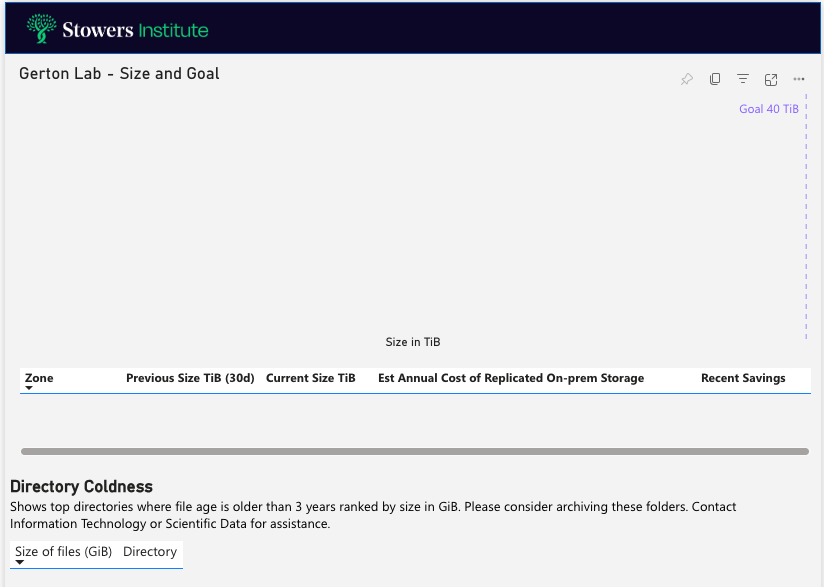
Now, when you go to share the report itself with someone who has that role, they should see the Power BI report as you generated it, but with no data showing up on the pages where you’ve filtered the data. So in the screenshot below, this is another lab’s page, as viewed by someone who has the Bazzini role. They can’t see any data on this page, just it’s structure and text, but they can see the data on their own Bazzini page per the RLS I’ve set up.
Keep in mind a limitation - when I was testing, at first I thought RLS wasn’t working. That’s because I used a report that I had published to a workspace that was collaborative, and my two test subjects were members of that workspace. Those permissions overruled RLS, so I had to publish to a private workspace and share the report with them that way to properly test. This is fine for my use case, as the people I’m building the RLS for aren’t members of the workspace either, but it did impact testing.
Using Row-Level Security in Power Automate
Now, this report does no one any good if I don’t share it out to people. Previously, I had set up a flow that looped through a SharePoint list of receipients and sent them each both a PDF of the report and a link to their individual report. That had to be re-thought with RLS in place, as the PDF generated would both not be filtered with RLS, and even if it was, it’s not an ideal experience to get 19 pages of PDF where your data is only located on page 14.
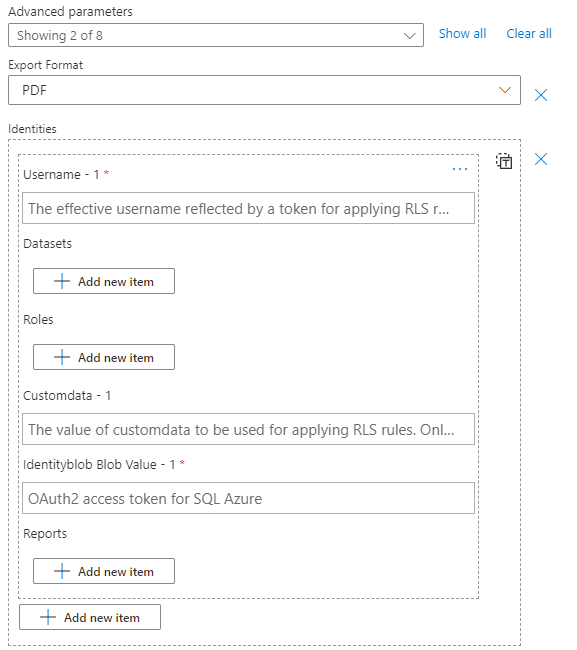
This is going to be posted as a Part Two (when I actually figure out the best way to architect this), so stay tuned! Sneak peak - one of these red asterisks is a lie! 😂